
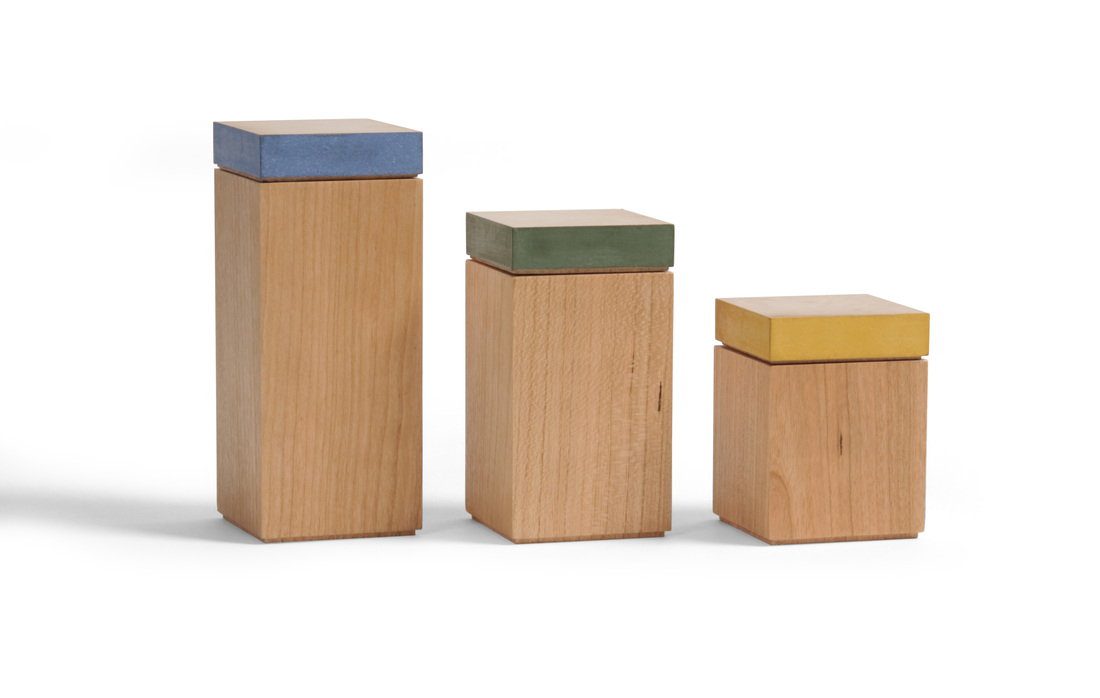
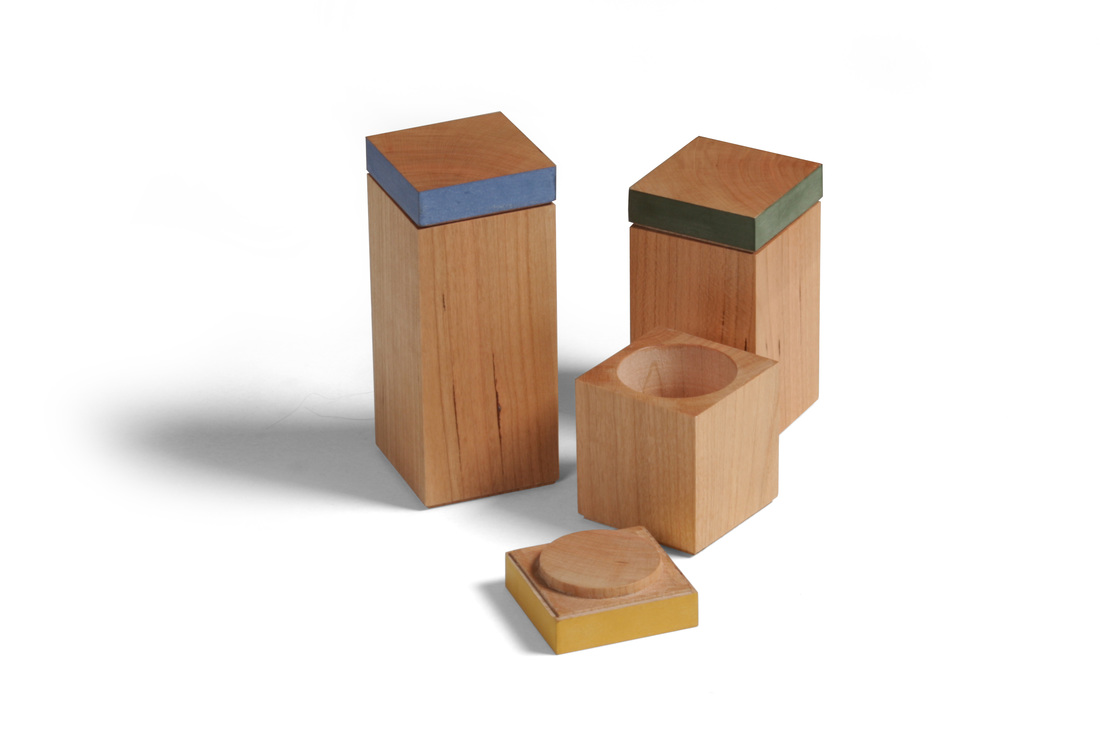
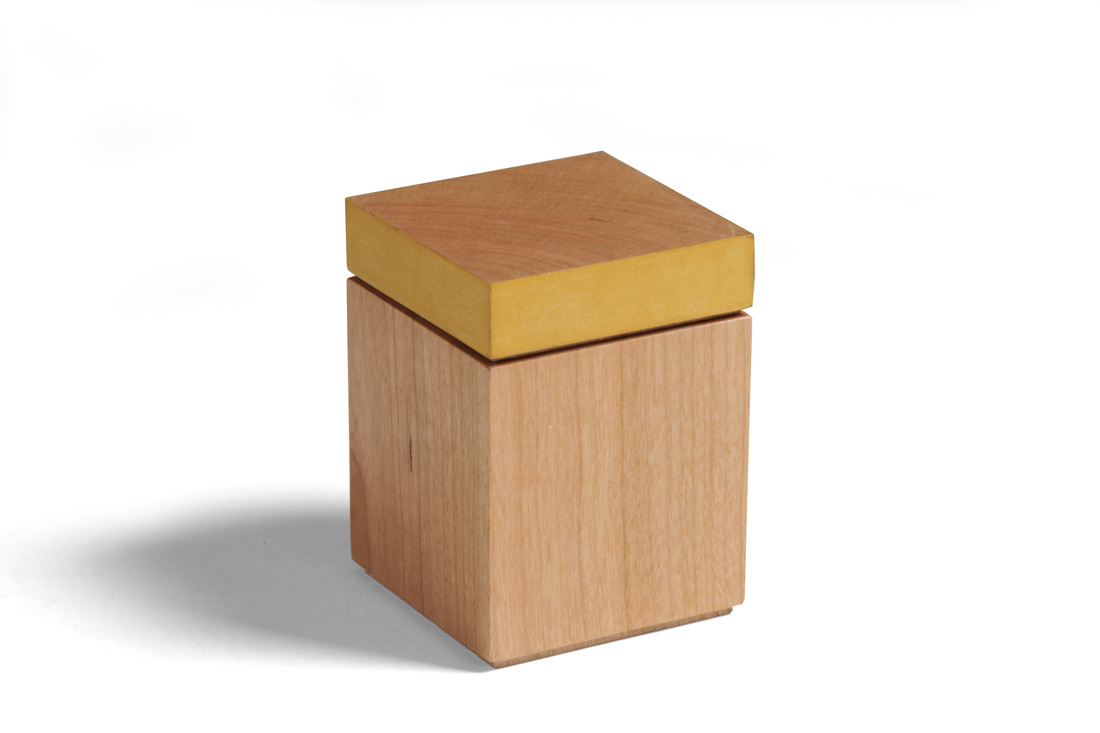
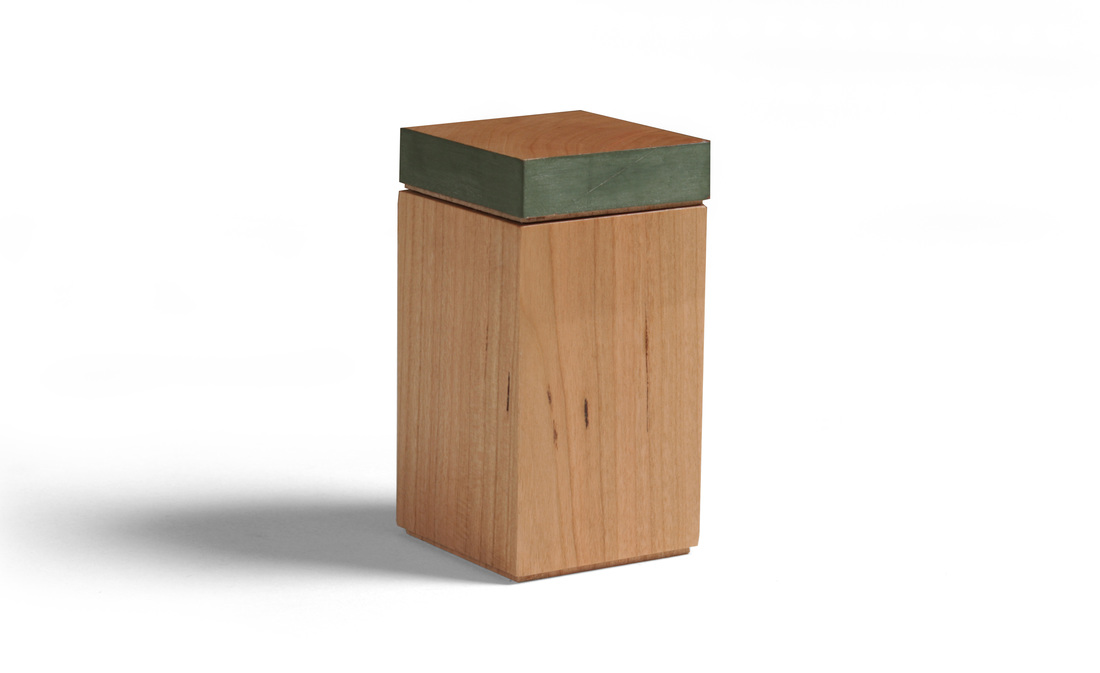
  I made these boxes because I asked myself a question while driving back from Maine. The question: What's the easiest and quickest box I could make? The answer, I thought, would be to drill out the center of a block of wood. Because of the round interior, the lid would need a matching round "plug" to keep it in place. Turning this would be quick and not difficult. So, I started with a technique and the technique largely determined the design. This explains, I think, why the boxes have a mechanized or mass produced feel to them. Normally, I design and then figure out how to make a box or piece of furniture. It results in work that has a far greater sense of having been made by a human hand. At any rate, I think I'll give this reversed working order another shot down the road--to see if I can eliminate the imprint left behind by allowing the technique to determine the design. I used some 8/4 cherry for the boxes, and after milling the board square, planing the faces clean, etc. the boxes ended up being about 1 3/4 in. square. I cut the bodies to length (2, 3 and 4 in. long), then chucked them into my lathe, where I drilled the holes with a 1 1/2 in. Forstner bit. This works fine, but my bit is getting a bit dull, so the holes aren't as clean as I'd like. The lids were also made on the lathe. After turning the round rabbet that fits into the box, I cut them to length at my bandsaw. The visible thickness of the lid is about 1/2 in. The process of making the boxes wasn't very hard, but it did have some problems that needed to figured out. For example, I should have cut the boxes to length after drilling them out. The lathe chuck left marks in the body that had to be planed away. Had the boxes been long, I could have just cut off the area with the marks. I really should have thought of this before I made them. (But I started making the boxes before I really thought through everything carefully.) Well, enough about technique. Here's what I like about the design. The best things about the boxes, I think, are their vertical orientation and the end grain on the tops. Using a piece of riftsawn cherry makes both work well. The straight grain running vertically on all four sides compliments the design, and also creates cool, diagonal end grain. I also like the bit of separation between the body and lid. It was created by rabbetting the lid after the round "plug" was turned. As for the the other side of the coin (what I don't like) I'm not sure if the painted edge of the lids works. Had the edge been thinner, it would look much better. Also, the round interior is not so great (I wonder if the shop's hollow chisel mortiser could hollow out the tallest of these boxes? I think have some expermenting to do).
4 Comments
Jeremy
7/30/2015 03:01:30 pm
I'm curious to know your reasons for using the lathe to drill the holes and not a drill press? Pros and cons of both?
Matt Kenney
7/31/2015 02:10:11 pm
Jeremy,
Jerry Stark
8/4/2015 11:15:44 am
As usual, these boxes are well designed and nicely executed, FWIW, I think the milk-painted edges work well precisely because they are a bit unexpected and they draw attention to the end-grain in the top, which is well worth the emphasis..
Nate Heath
2/20/2017 01:56:45 pm
Great stuff. I don't have a lathe or a drill press, but I think I'm going to give this a shot anyways. I'll probably end up using a gouge once I drill the majority of the interior space out. Should be a fun (first) woodworking project. Your comment will be posted after it is approved.
Leave a Reply. |
AuthorI love furniture design, and smart techniques. This blog is about both. Archives
August 2020
Categories |

 RSS Feed