
When I began my 52 boxes in 52 weeks project, the primary goal was to develop my design aesthetic and improve my design skills. I'm not ready to decide whether I've accomplished those goals, but I think it's OK to discuss something that I've learned, and offer an illustration of it. Here it is: design happens through evolution not revolution. I suspected this before I began, but I've watched it happen over the last 11 months and have no doubt about it now. This evolution is not a result of some natural talent for design. It is, rather, the outcome of asking a simple question: What could I do differently? I'd like to demonstrate this truth by explaining how I came to the very lovely pull used on box 46. What I hope is that you'll read this and feel empowered. Good design isn't difficult. All it takes is the willingness to ask a question, and the courage to fail (because not everything you try out will succeed). Well, let's get started. Click on the pictures below to see a larger version.
0 Comments
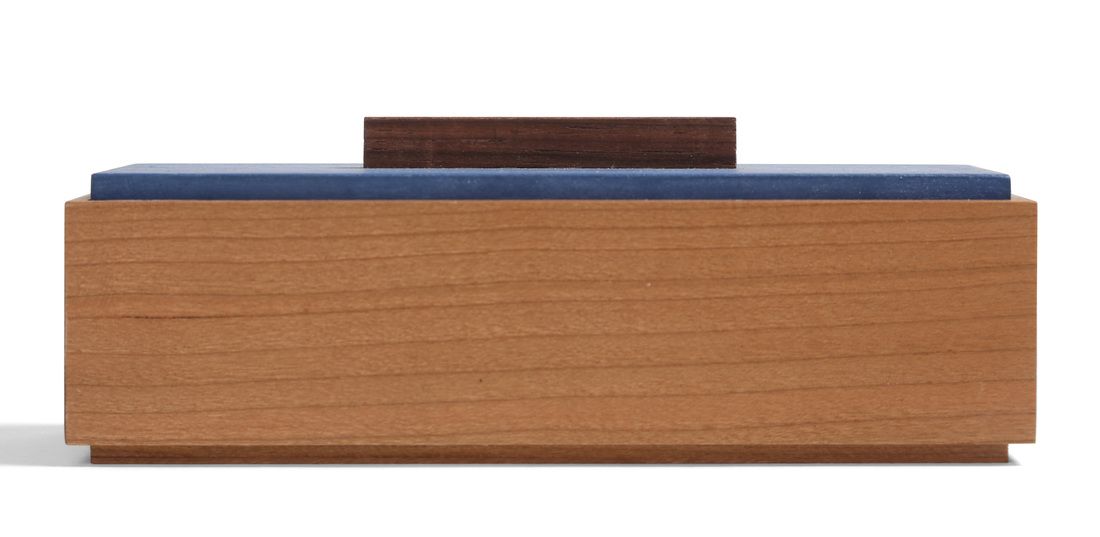
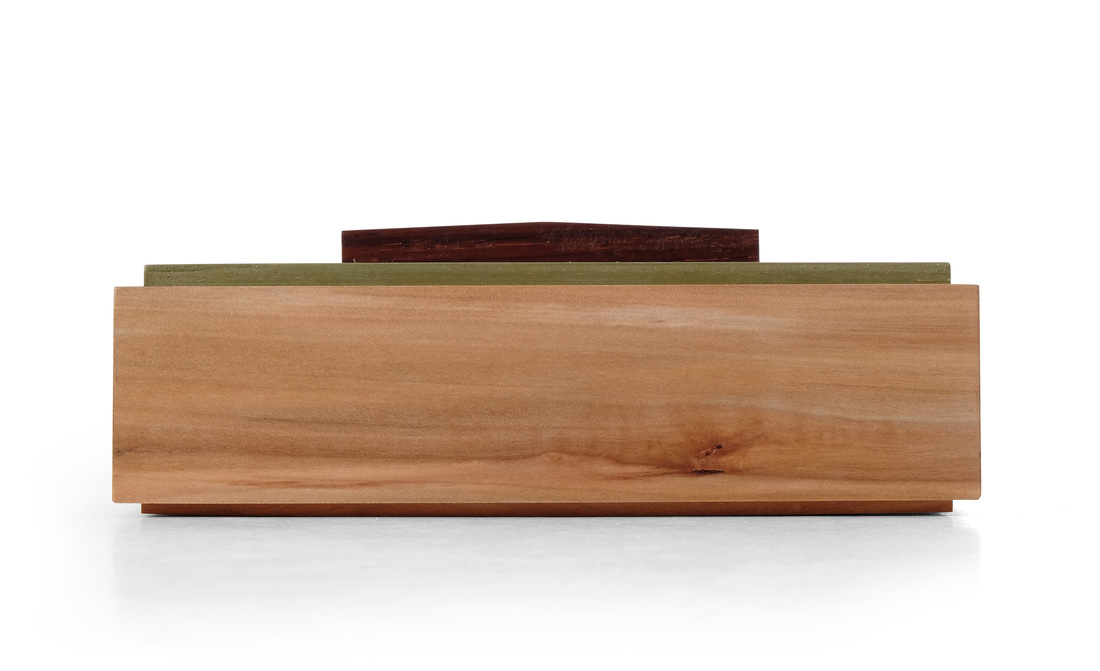
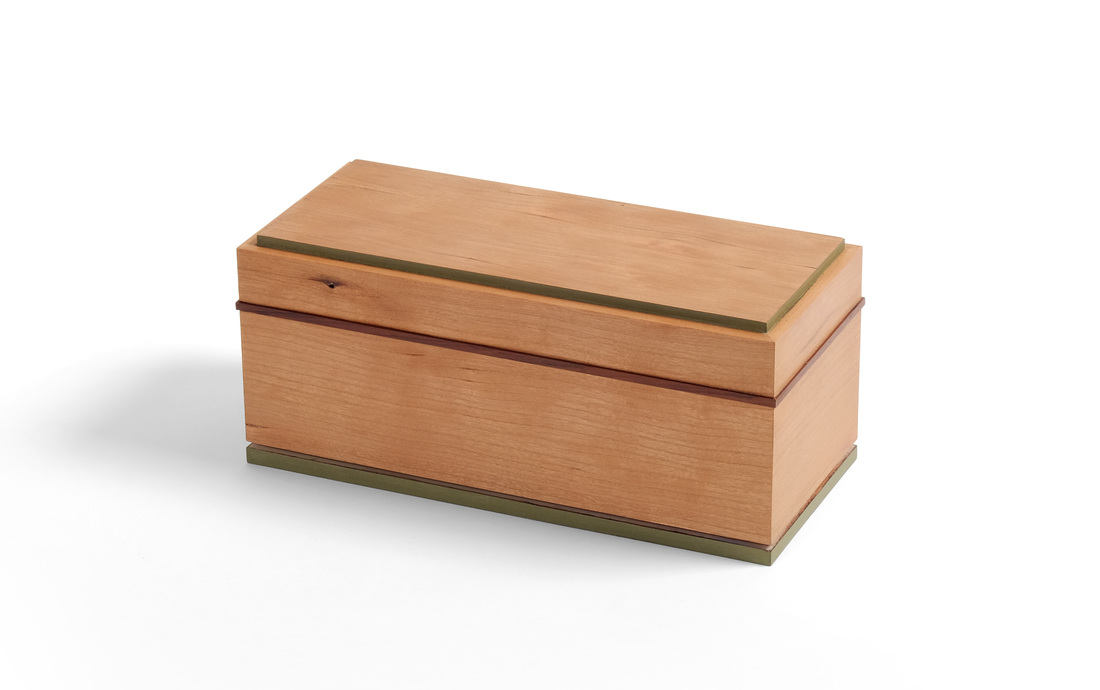
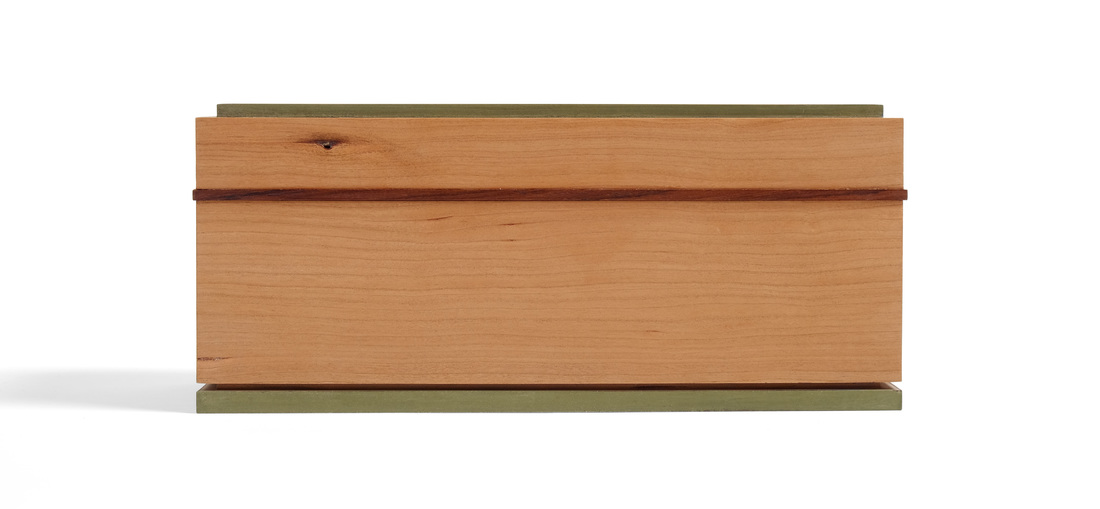 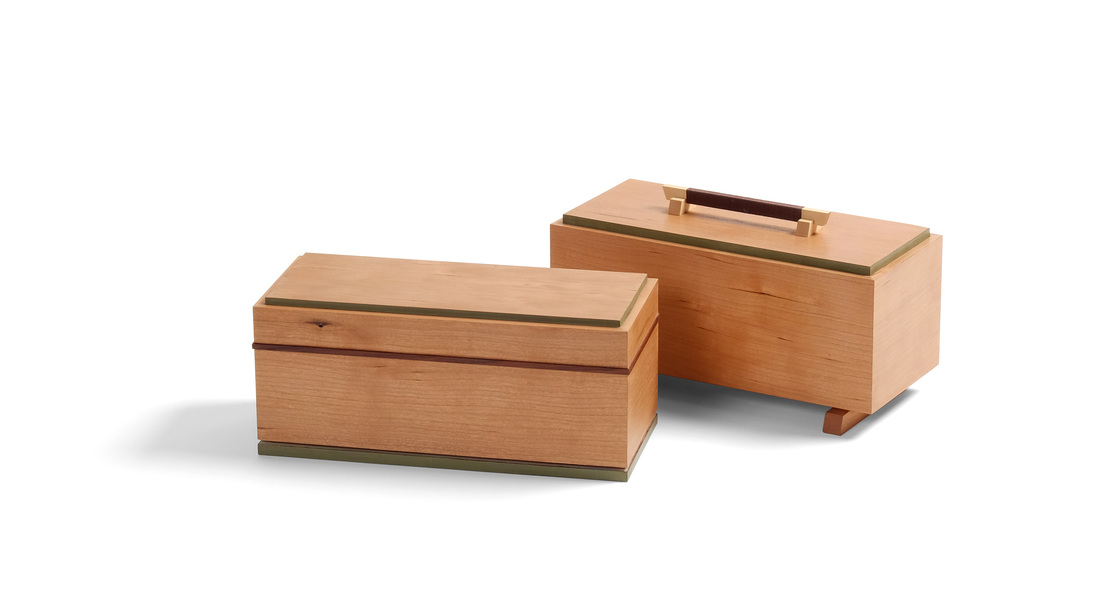 Here's the second of two boxes that I made using the same dimensions for the box body, and the same species of wood (actually, both boxes were made from the same board). The first box was posted last week. I wanted to see how different, how unique, I could make two boxes that had these similarities, that were the same box at their core. There was an easy way to make them different. I could have given one of them eight legs and a head, making it a spider box. Or some other whimsical nonsense. I wanted more of a challenge, so I limited myself to variations in the lid, pull, and base. What's funny is that although I did make two boxes with unique souls, I also ended up with two boxes that are clearly from the hand of the same maker. I suppose that's really not surprising, but when I first put them next two one another I was struck by it. Actually, it makes me happy. I think it shows an admirable level of design maturity (I'm sure I'm flattering myself in thinking this). I took a narrow set of design parameters and created two distinct boxes that are clearly expressions of my aesthetic. I didn't have to resort to outlandish and absurd differences to get the job done. A few subtle changes is all it took. I believe this means that I've grown as a designer, developed a better understanding of how to apply my aesthetic. This also means, I believe, that my aesthetic is flexible, and this makes me happy, too (a point further illustrated by box 45). Well, that's enough philosophic ruminating. Let's get to the box at hand. I think that as I talk about what I was thinking as I designed this box I won't be able to avoid talking about the first box, but that should be instructive. I'll start with the pulls. On this box the pull is cocobolo banding that wraps around all four sides of the box. I made it just as I did the pull/lid keeper on box 36. It's less than 1/16 in. proud of the sides, but this is more than enough for your fingers to get hold of and pull the lid off. This is a very different style of pull than the one I used on the first box. But, notice that this pull is cocobolo, and that I wrapped the pull for the first box in brown thread. Brown is a nice complimentary color for the cherry box and green milk paint. It makes a great third color to introduce. Using it in the pull means that there will be less of it than both the warm, earthy reddish brown of the cherry and the lovely green milk paint. I'll admit that I chose cocobolo without thinking of the connection to the brown thread, but I certainly chose it for the same reasons that I went with brown thread. It's a strong wood that works well as a tertiary color. (As a primary or secondary wood, cocobolo becomes is overbearing, I think.) At any rate, the pull turned out to be something that both distinguished the second box from the first, but also connected the two. On to the base. I've used this style before (boxes 41, 42, and 44), and I'm starting to really like it. It's plywood with a shopsawn veneer on the bottom face and fabric on the top face. The edges are painted with the same custom green milk paint as the edges of the top. The bottom's edge is thicker than what you see of the top's edge, so the bottom has more weight and can anchor the box. I made this bottom a bit different that I did when I used it previously. The plywood portion of the bottom fits into a rabbet in the box. This means that there is a fairly deep rabbet around the top edge of the bottom, which results in a dark, distinct shadow line. The box seems to float above the bottom. I like it. As for the top, I made it by gluing a panel into a rabbet and then cutting the box body in two. It's quite similar to, but still quite different from the top I used for the first box (a panel that fits into a rabbet). The liner does not keep the lid in place, the pull does. As I did with the first box, I painted the edge of the panel to create separation between the box sides and the lid panel, and I did it for the same reason. It allows the panel to pop as if it were a second species, or a highly figured piece of cherry even though it's cut from the exact same board as the sides. The green creates a visual boarder around the panel. Random thoughts time let it be.
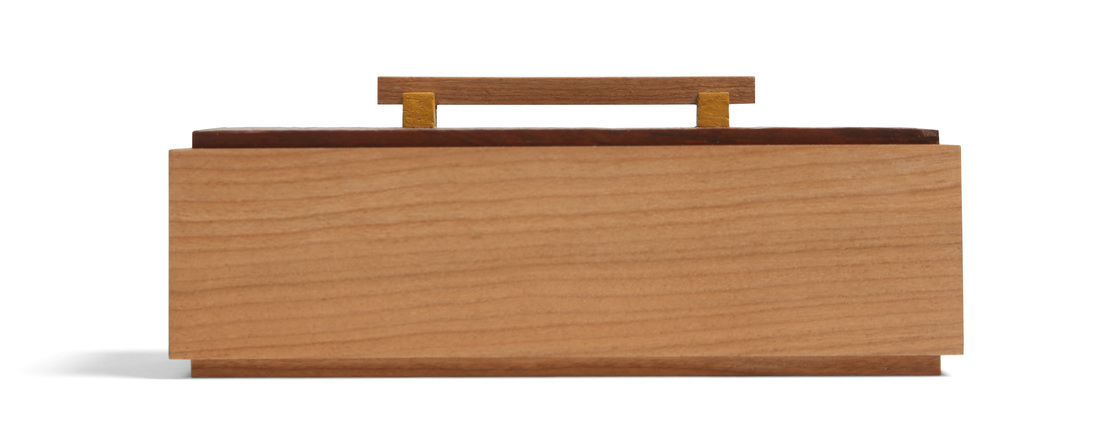
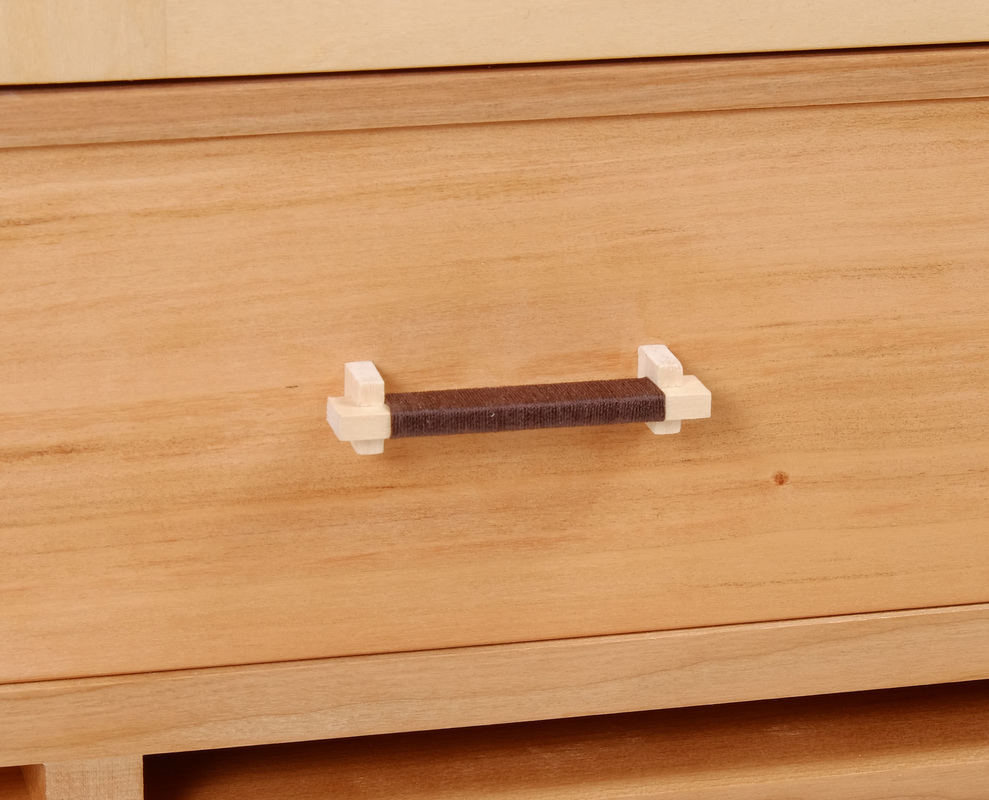
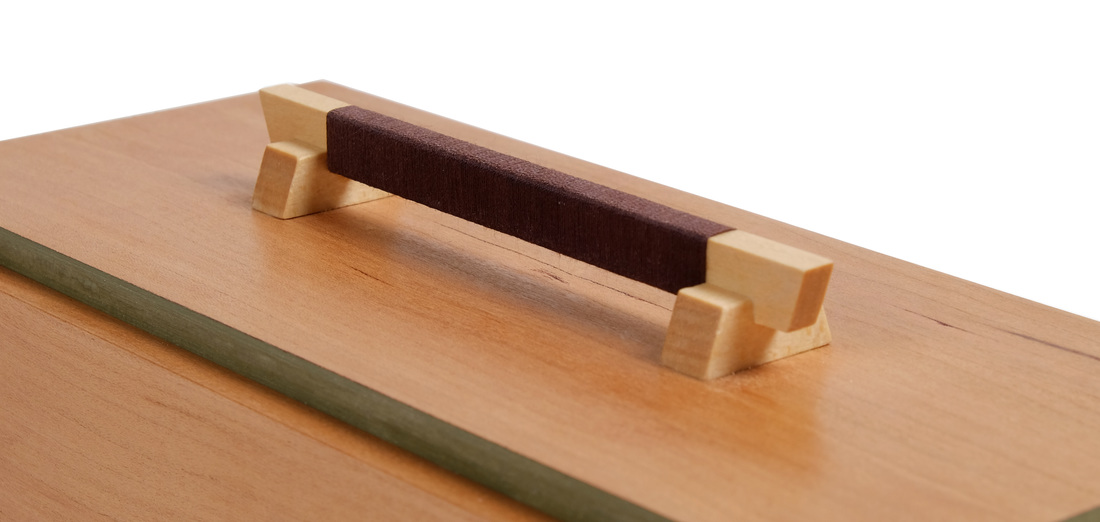
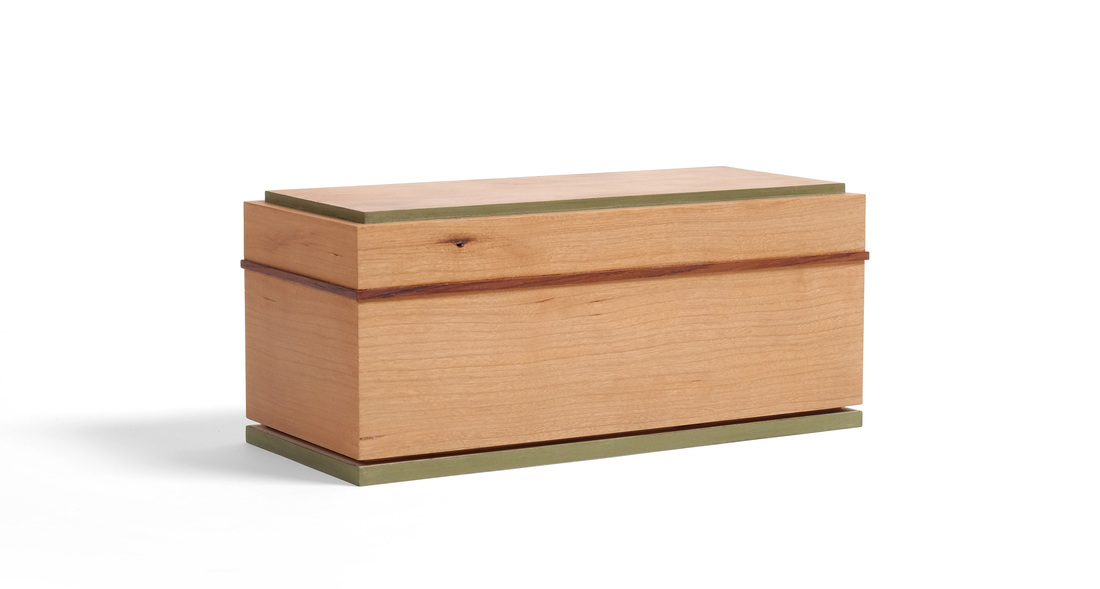
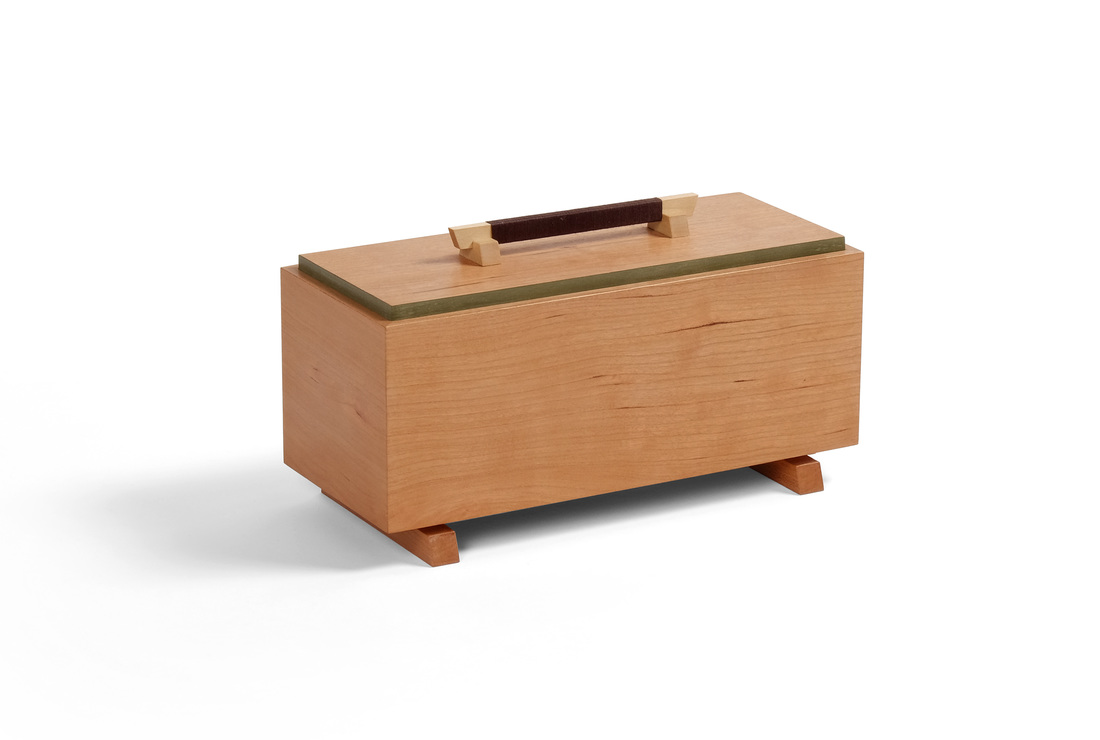
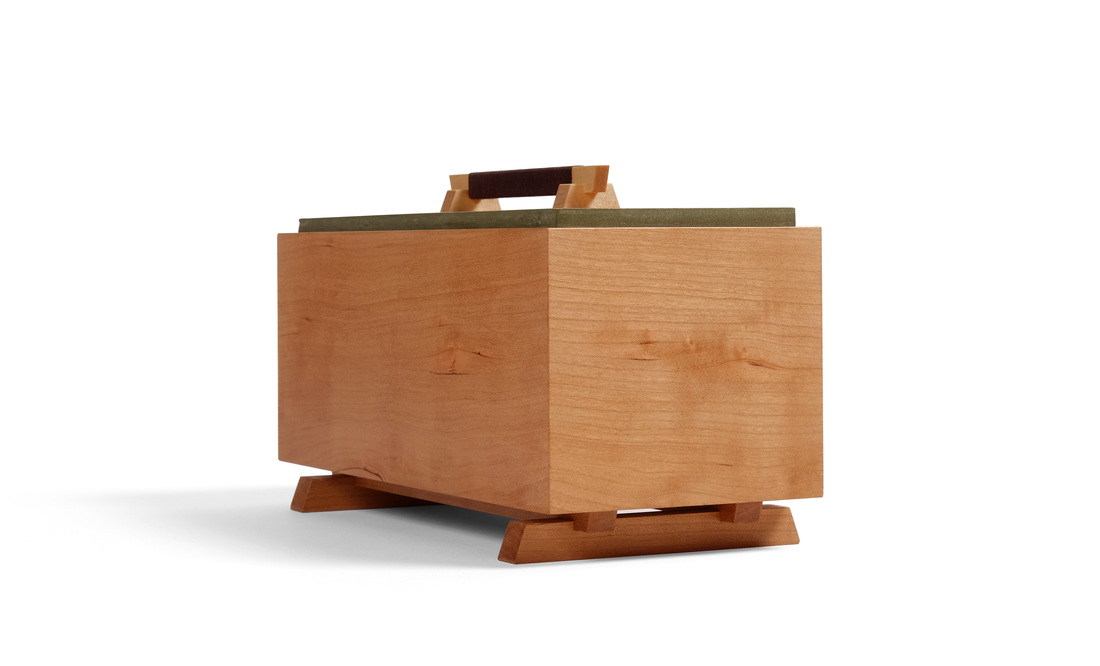
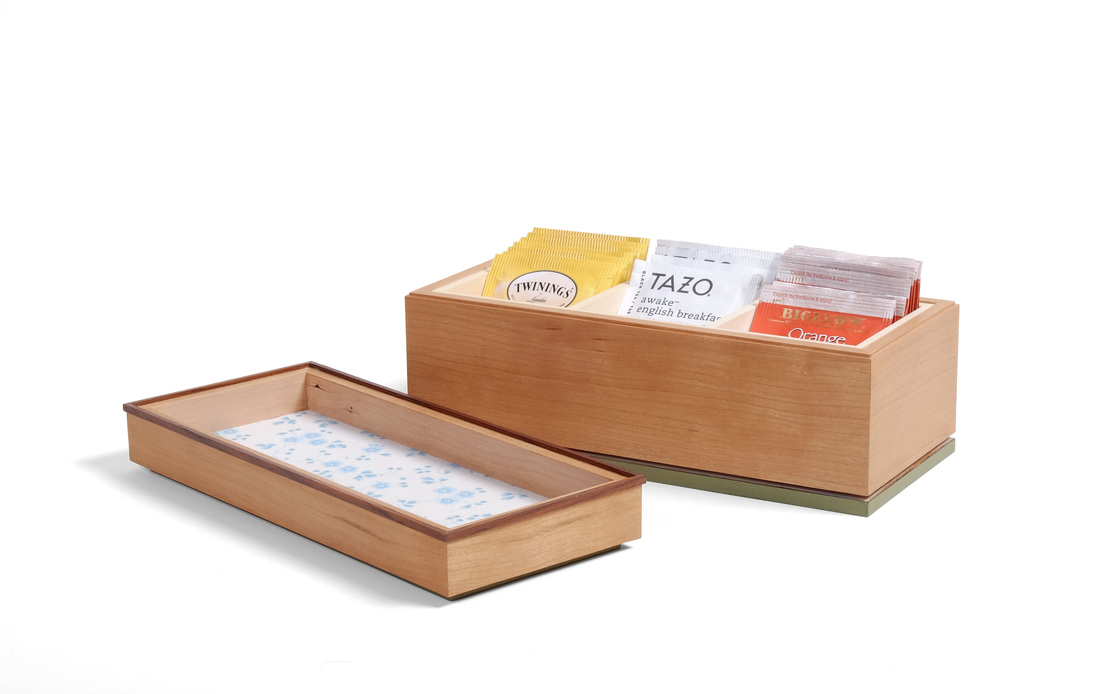 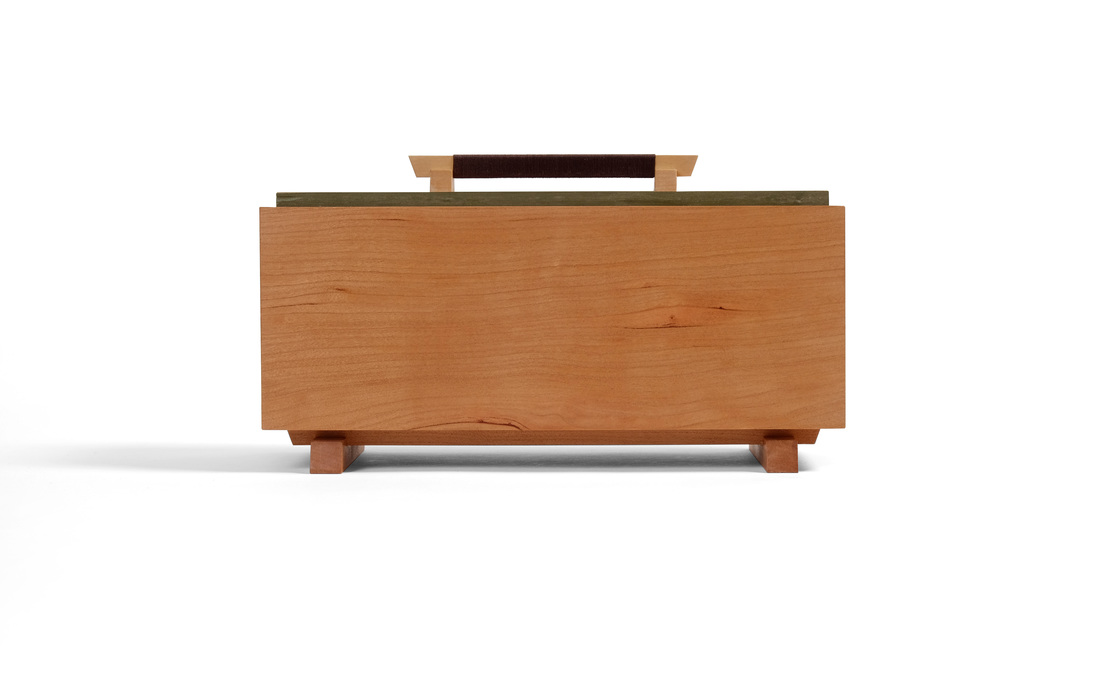 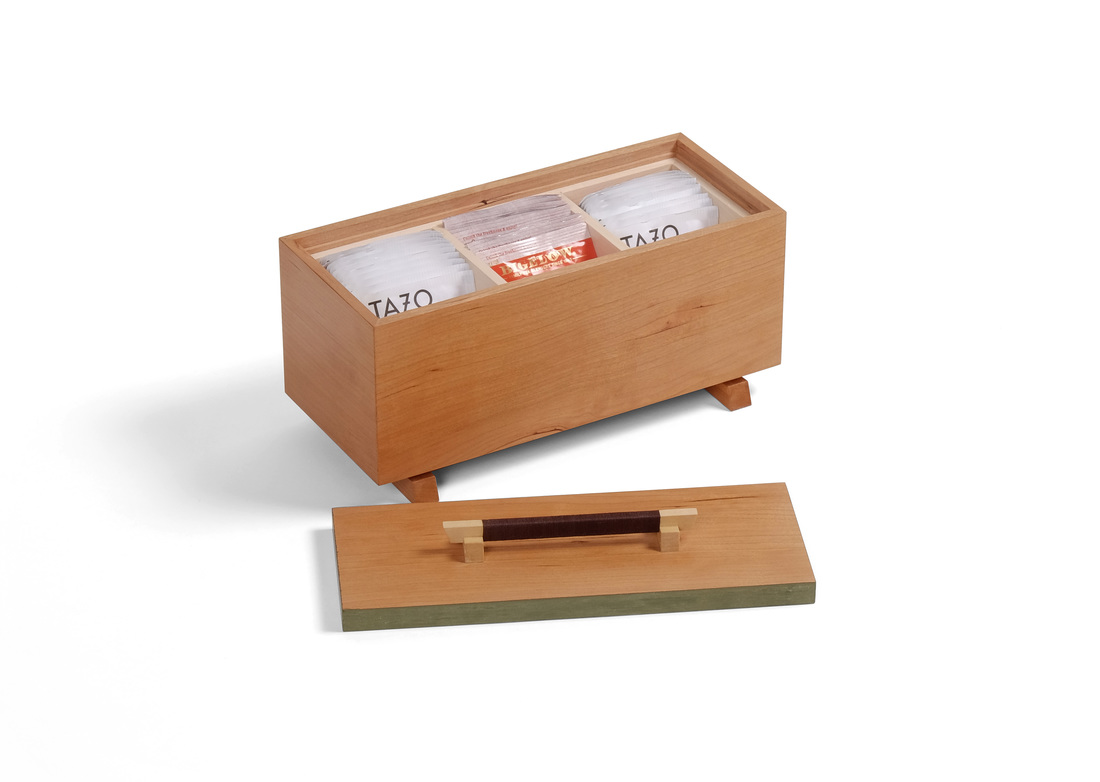 This is the first of two boxes that I made using the same dimensions for the box itself (that is, not including feet, lids, pulls, etc.). I even made both boxes from the same piece of cherry. Why? I wanted to see how different I could make them. Next week I'll post the second box. Both boxes were designed to hold tea packets. I started from the known dimensions of a tea packet (and it's a common size) and worked out from there. There are three slots for tea. These are created by a liner that is dry fit in the box. After adding up all of the involved dimensions (side thickness, liner thickness, top/bottom thickness, width and height of a tea packet, etc.), I knew the width, length, and height of the box. From there is was a matter of figuring out how to give each box its own unique soul. The first two decisions I made about this box is that it would sit atop some type of foot structure and that I would not cut the sides apart to make a lid (as I did on box 30, for example). I tackled the lid first. I went with an old friend: The lid that sits down in a rabbet cut into the inside face of the sides. A lid this big would need a substantial pull. Last week, I used some cool thread wrap pulls on a large tea cabinet. I decided to adapt that pull style to this box. This pull is much larger (the horizontal bar is 4 1/2 in. long), which gave me enough meat to work with that I could bevel the ends of the pull and the ends of the feet. The bar and feet are made from basswood, and the thread is a brown embroidery thread (thicker is better for this purpose). I applied shellac to the basswood before wrapping the thread. I think the pull turned out quite well and it's a style of pull that I'll continue to explore and develop. For the sake of stability, I made the lid from plywood, gluing shopsawn veneers to the top and bottom faces. The veneers were cut from the same board as the sides. The plywood top also allowed me to glue the pull to the lid without any concern that wood movement might eventually pop the pull off. The edges of the lid are painted with a custom green milk paint. I don't know if I've ever explained why I occasionally paint the edge of lid. Here it creates separation between the lid and the sides. Without this bit of color, the lid and sides would simply melt into one another, because they're made from the same piece of wood. The color and grain match is perfect, and without the green you'd just have a big, indistinct blah. This little strip of color creates a border between the two, which allows the beautiful warmth of the cherry's color and its calm, but elegant grain really pop. The box is subtle and unassuming but still possesses a striking beauty. This approach appeals to me far more than slapping a wildly figured or super-contrasty wood on the box as a lid. (As I see it the dependence of figured and contrasting wood is lazy design.) After I figured out the lid and pull, it was easy to work out what the box would be sitting on. The feet are just a modified version of the pull. There are two long horizontal pieces and the feet are much longer, too. This design creates a balance between what's above and below the box. The bottom is plywood, which is important because the best (and most stable) way to attach the feet is to glue them on. However, if they had been glued to a solid wood bottom, the bottom's movement definitely would have either pulled the feet apart or caused the bottom to split. So, plywood it is. There's a shopsawn veneer on the bottom face of the plywood. And like the feet themselves, the veneer is cut from the same piece of cherry as the box and lid. By the way, the top surface of the bottom is covered in a very nice fabric. Sure, you'll never see it because of tea packets. But it's there for the occasional glimpse, to show that every detail has been carefully considered. Well, I think that's enough. Here are the random thoughts, which I enjoy writing even if no one enjoys reading them.

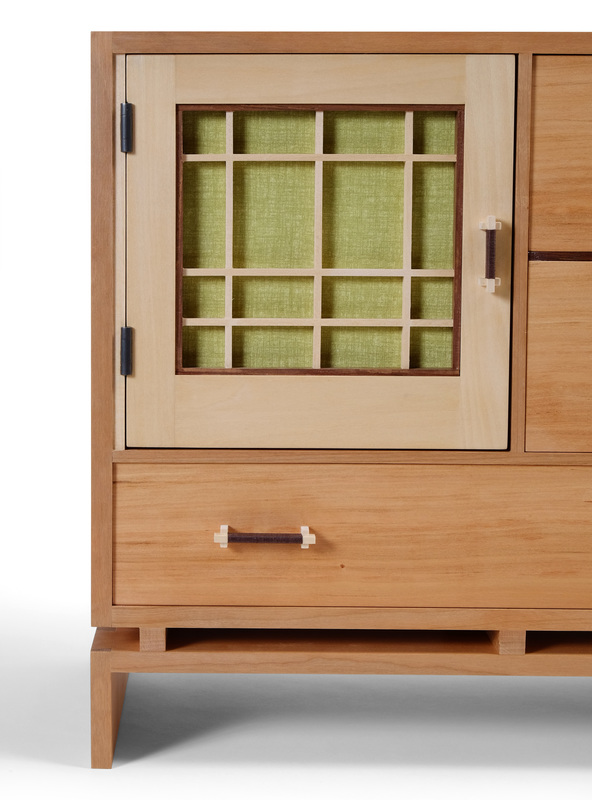
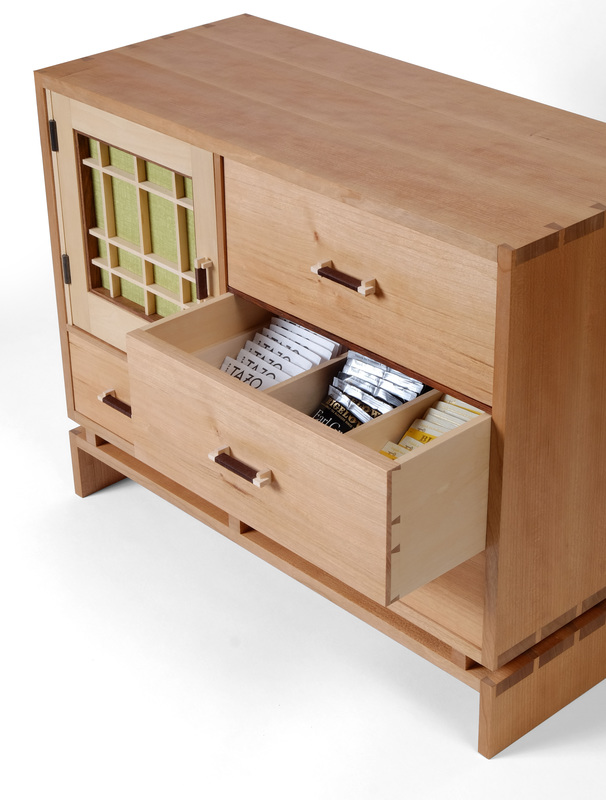
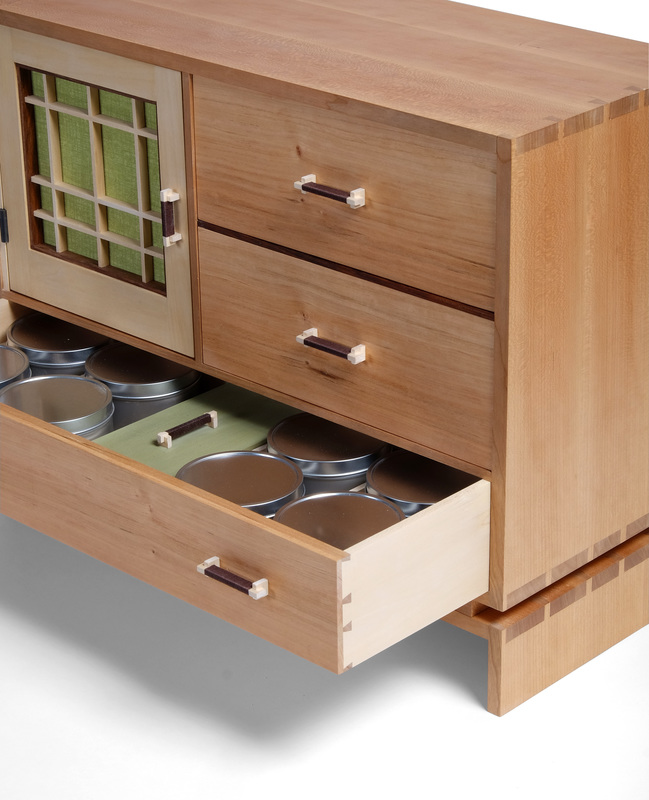
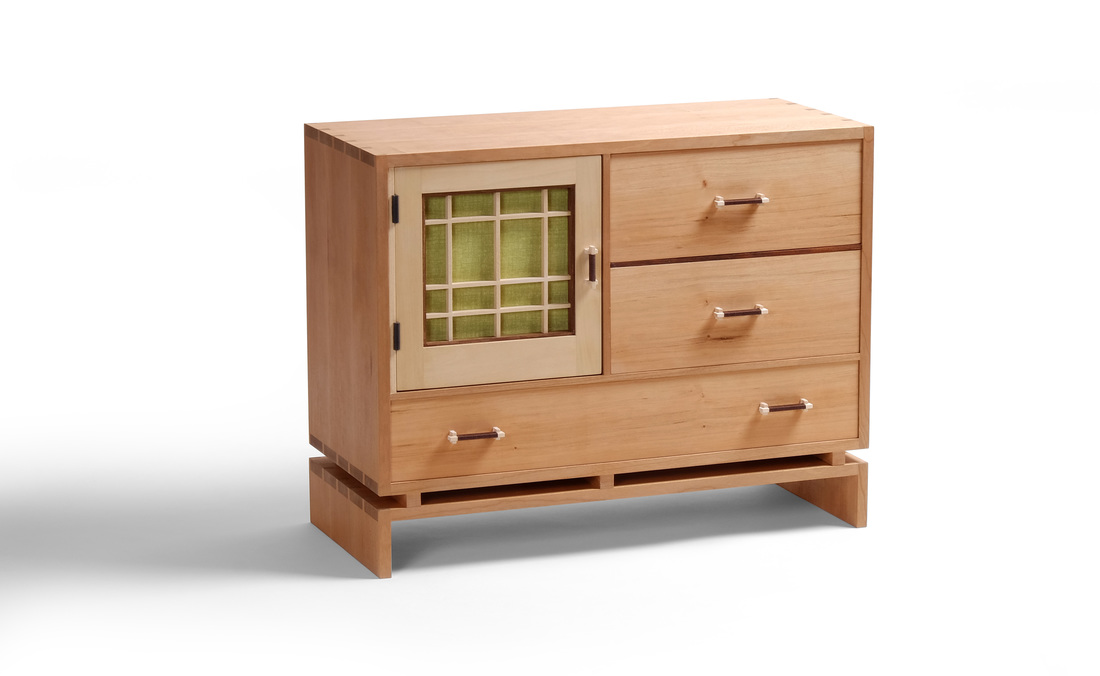
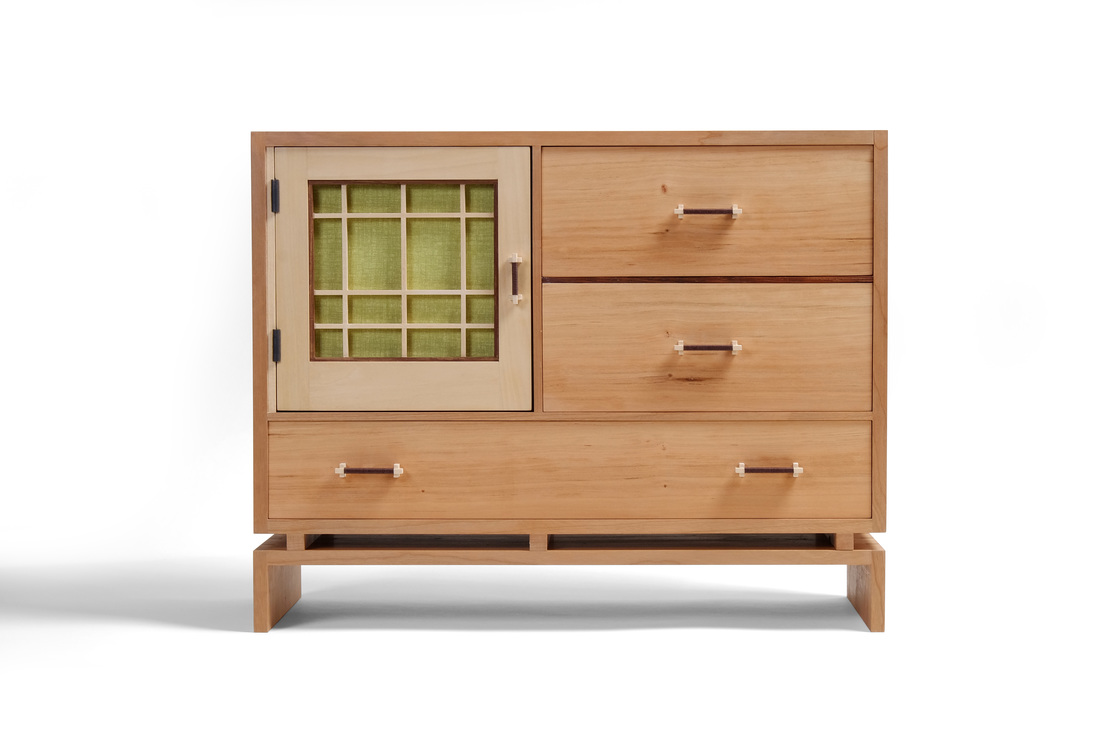  It's been a while since I last posted a new box, and this box is the reason why. I first posted a drawing of it eight weeks ago on my Instagram feed. Since then I've started and completed four other boxes, and taken two long trips for work. I've been working on it all along. And now it's done. Happy, happy, joy, joy. (Yes, I watched Ren & Stimpy. No, I did not use psychedelic drugs.) Let's get to it, then. To begin, it's a tea box. The bottom drawer holds loose tea. The two top drawers hold tea packets. Behind the door is a cubby for a teapot and teacups. I don't drink tea, but I very much like the ritual of drinking tea. I don't have in mind the Japanese tea ritual (although this box clearly has some nods to Japanese design), but the ritual of afternoon tea at Fine Woodworking. It's a brief break in the day when most of the staff gets together to relax and talk. The folks I work with are wonderful, funny, bizarre (in the most glorious and endearing ways), endlessly interesting, and even a bit bawdy. There is a clockwork to the way tea time happens: who boils the water, who sits (or stands) where, what we talk about, the jokes we make, etc. I love the work at the magazine, but I cherish the people I work with even more, and that's especially true at tea time. I made this box for them, from my fondness for them. (By the way, there is no doubt that I am the most bizarre, and perhaps most bawdy, of the bunch.) This box is nearly as big as the kindling box I made not too long ago, and takes its basic form from the kindling box, too. The case sits upon a base, separated by some spacers. Note that the middle spacer is in line with the divider between the door and drawers. Pleasant. Harmony. Had it been centered between the other two spacers, it would have created a visual disconnect, and instead of blending quietly into the piece it would have been a jarring presence. As it is, the three spacers become part of the overall case structure, and the negative spaces they create contribute to the overall success of the box. The bottom drawer is shorter than the other two, but I think it works here. I was skeptical at first, because wider drawers at the bottom give a piece visual grounding. With this box, the base creates a sense of lightness and elevation, so it's OK that the bottom drawer is shorter. Like the base, it's helping to lift up the box. But if you take the two together they are a solid foundation for the box. How does that work? It's the vertical divider between the door and two top drawers. The bottom drawer and base run the full length of the box. The space above them is divided, so you get a visual division between the bottom drawer/base and the upper part of the case. And here we come to the importance of varying the thickness of parts. The thickest parts are those on the perimeter of the case and base. The horizontal divider above the bottom drawer is slightly thinner. So too is the vertical divider separating the door from the two drawers on the right. They define the internal structure. The cocobolo divider between the two upper drawers is thinner still so that those two drawers are structurally subordinate. This variation in thickness creates a structural hierarchy that visually tells you that the base and bottom drawer are taken as a foundational pair even though they are separated by some beautiful negative space. This all makes sense to me. I hope it makes sense to you. If it doesn't, write your questions on the back of a post card and mail them to the guys at Car Talk. They're smarter than I am, and much funnier, too. Holy yard goats! This is getting long, and I haven't even gotten to the door and pulls yet. So, what about the door? It's made from basswood, which I chose because of it's color and lack of any visible grain. I wanted the door to be about the fabric panel and lattice that overlays it. Mike Pekovich, my friend and colleague at Fine Woodworking, has been experimenting (quite successfully) with kumiko recently. (Check out his Instagram feed to see what he's been up to. It all rocks the house party.) As always, I feed off what he's doing. But traditional kumiko patterns would obscure the color off the fabric panel, so I went for a simple pattern based on rectangular negative spaces. This is much more in keeping with my design aesthetic. It's also in keeping with my propensity to take traditional material and design details and use them in very modern ways (milk paint, for example). I like how it turned out, and I plan to use lattice work more often. I chose cocobolo for the frame to create some separation between the door and the lattice. It was a risk, but I think it worked out nicely. I had already decided to use cocobolo for the front edge of the divider between the two top drawers, and using it for the frame gave some unity between the two halves of the upper part of the case. And cocobolo brings us to the pulls. All of their parts are 1/8 in. thick, like the parts of the lattice work. The little feet have notches in them into which the bar fits. In this way they are tied to the kumiko. I then wrapped brown embroidery thread around the section between the feet. The color of the thread ties the pulls to the cocobolo. (On a side note, these pulls are closely connected to the pull on box 10, because I got the idea for them from that box.) Also, the notion of a pull with cord or thread wrapped around it is something I've seen in Japanese furniture, but I don't have the wherewithall to find anything I could link to. There is still so much more that I could write about the design of this box. Why did I use an asymmetric pattern for the lattice? Why green fabric and not blue or red or yellow? Why butt hinges instead of knife hinges? And what was I thinking when I painted the inside of the cubby white? The answer to all of these questions is 42. And don't forget your towel. Are they still random if I do them every time?
|
AuthorI love furniture design, and smart techniques. This blog is about both. Archives
August 2020
Categories |


 RSS Feed