
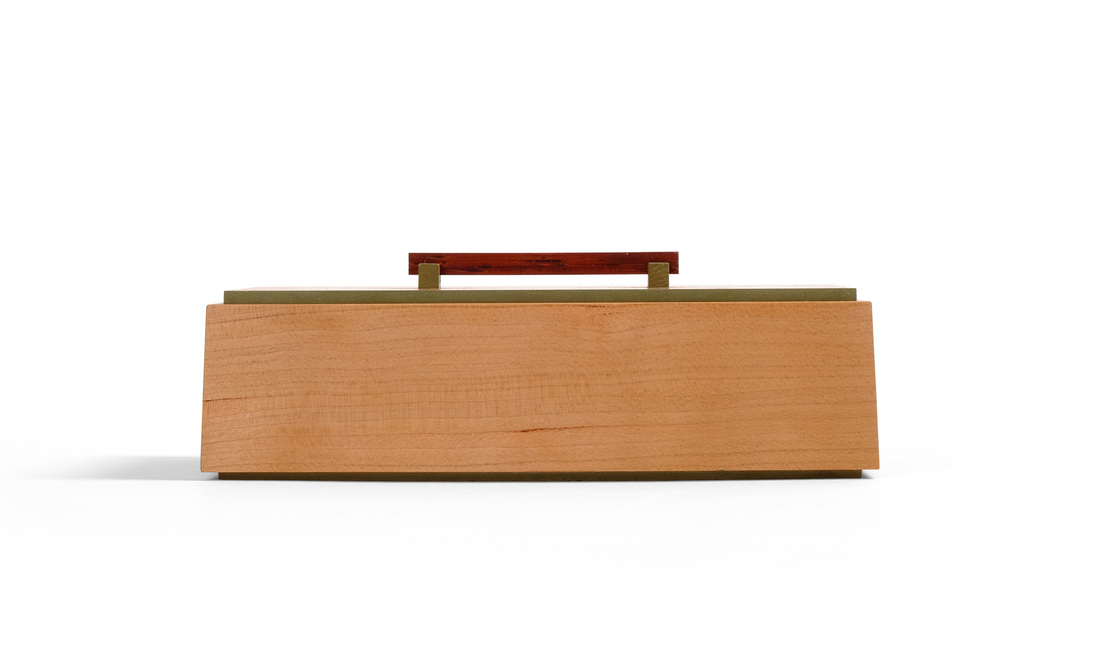
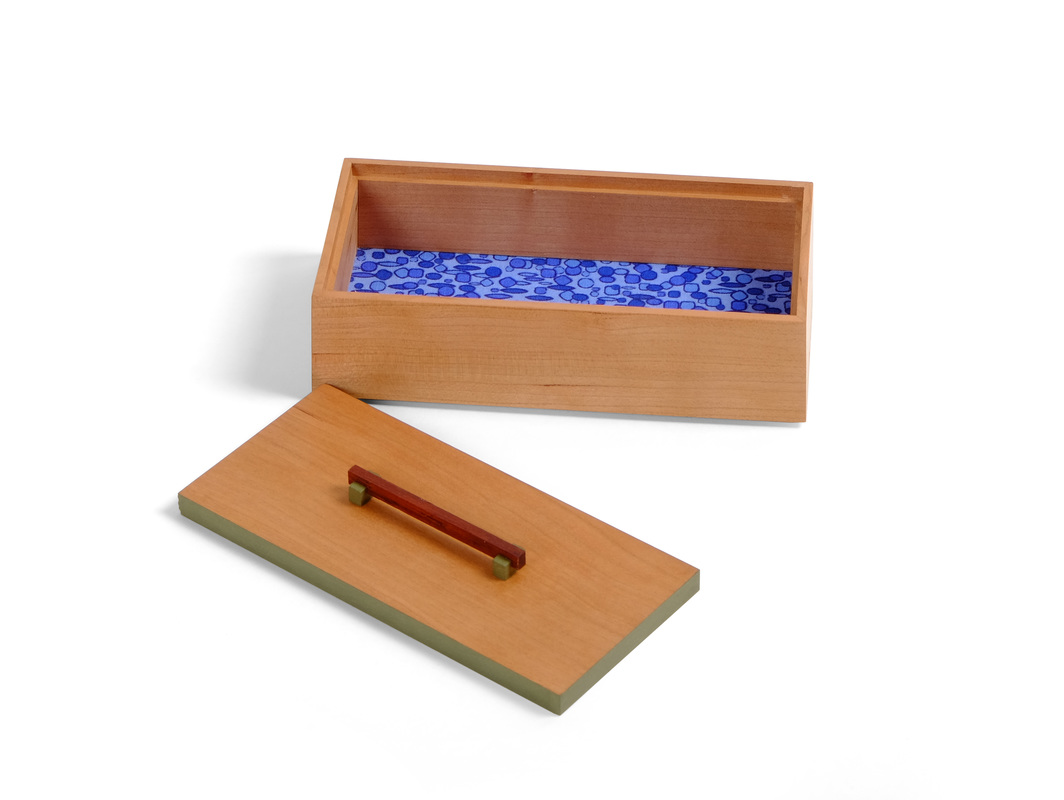
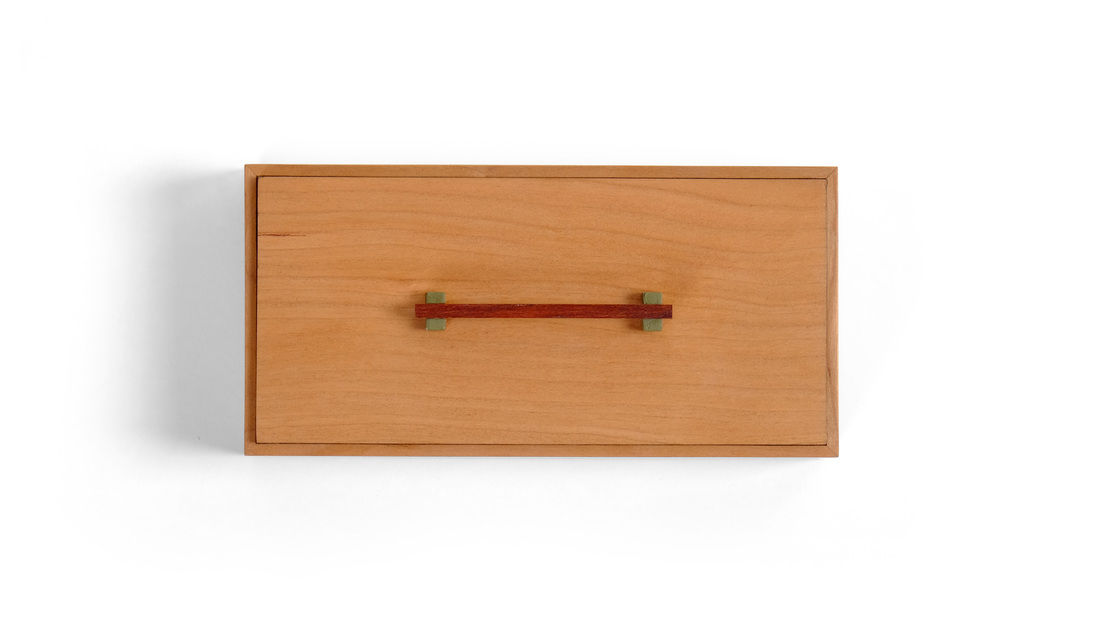
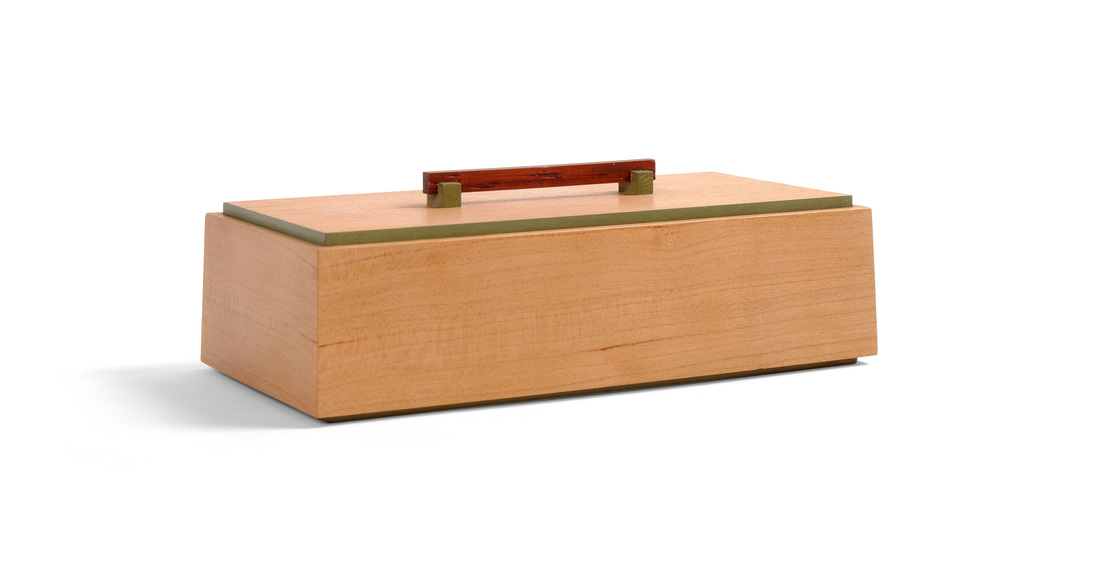
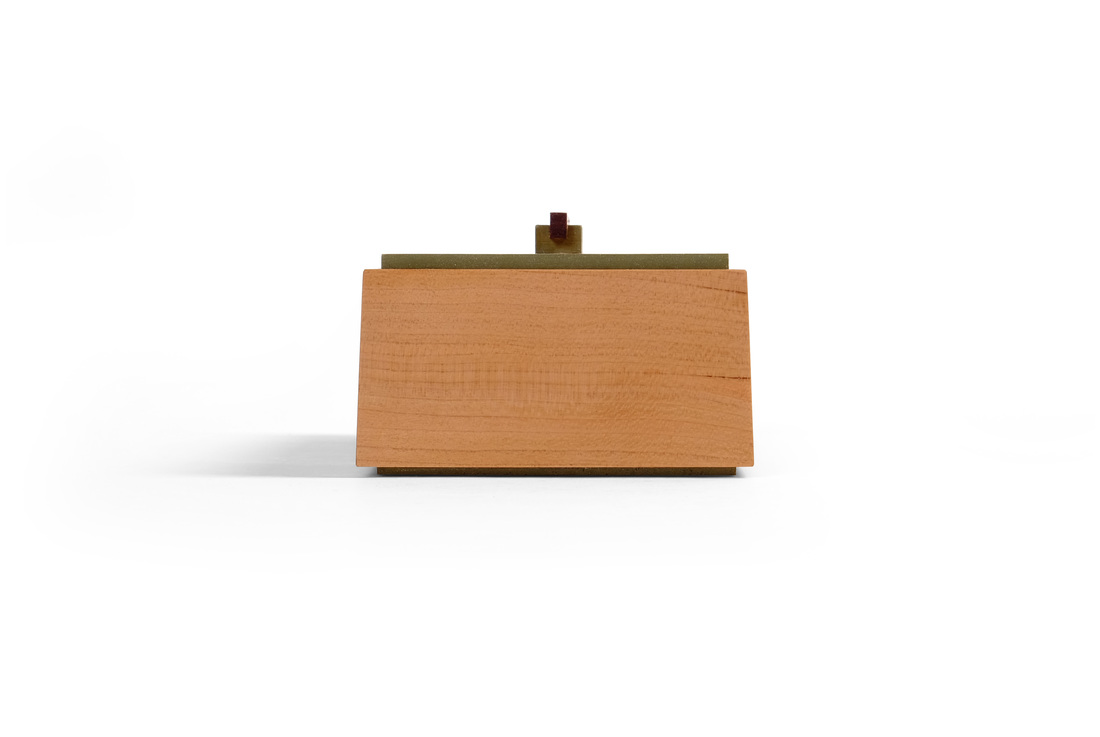
  This one feels like a big deal. It's box 50, after all, but I also think it's important because it's a refinement of a box that I've been making for several years: my old friend, the two compartment box (right). It has smaller overall dimensions (1 1/2 in. by 3 in. by 6 in. versus 2 in. by 5 in. by 8 in.), has one compartment instead of two, uses a more stylish pull, and has thinner sides and top. These differences make the box simpler and more delicate, but what makes it more elegant is the inward sloping sides and milk painted edges on the top. These are subtle things, certainly, but they make a big difference. However, I'm kicking myself a bit because had I used a slightly different pull, a slimmed down version of the one I used on box 46, this would be a perfect little box. I guess I'll have to make it again in the near future, just not before I finish the 52 box project. That's quickly coming to a close. And I already have the last two boxes designed (in fact, box 51 is just about done). The inspiration for this box came from the second box I ever made (many, many years ago). We still have that box. It sits on my wife's dresser. It's at least 1 in. taller, and is closer to square in width and length. It also has sloping sides, but I made them by starting out with thick sides and planing the slope into them after assembly. This box has 3/16 in. thick sides. There are compound miters at the corner that result in the inward slope. As I did for boxes 13, 14, and 15, I used a "wedge" to cut the compound miters, the rabbets, and the top and bottom edges. I like the technique because the wedge guarantees that all of the angles will be correct. As a result of the more refined construction, this box is more elegant than the original. I'd like to say that a lot of careful thought went into the design of this box, but that wouldn't be true. I looked at the older box, asked how I would make it now, and the answer came to me quickly. Make is shorter, make it a rectangle, and use compound miters at the corner. I also used the bottom to create a shadow line at the bottom. And the pull is similar to others that I've used. What I did, in other words, was take design details that I've been using this past year and put them together in a new way. In a way, there's nothing new hear, but in truth its a very new box. And it's one of favorites. I love its delicacy, elegance, and the beautiful fabric inside. I don't think I have anything else to say about this one, but you're more than welcome to ask questions if you have them. Here are a few random thoughts.
5 Comments
Christopher J Bowen
4/22/2016 10:38:01 am
:D
Dave B
4/22/2016 11:02:55 am
Very nice Matt. I'm still not clear how you've employed the wedge for your compound miters, any chance of a FWW article any time soon? Very cool project, box 4 is still my fav.
Matt Kenney
4/22/2016 01:50:42 pm
Dave,
Jerry
4/25/2016 12:29:14 pm
I completely agree with you. The slanted sides make a big and positive difference. The result is a really nice box that also feels really grounded -- as direct result of the sloped case sides.
Karen
8/8/2016 12:17:37 pm
Just discovered one of your boxes on Pinterest. Absolutely love all of them!! Reading your blog has been a joy!! Great job. Your comment will be posted after it is approved.
Leave a Reply. |
AuthorI love furniture design, and smart techniques. This blog is about both. Archives
August 2020
Categories |
 RSS Feed