
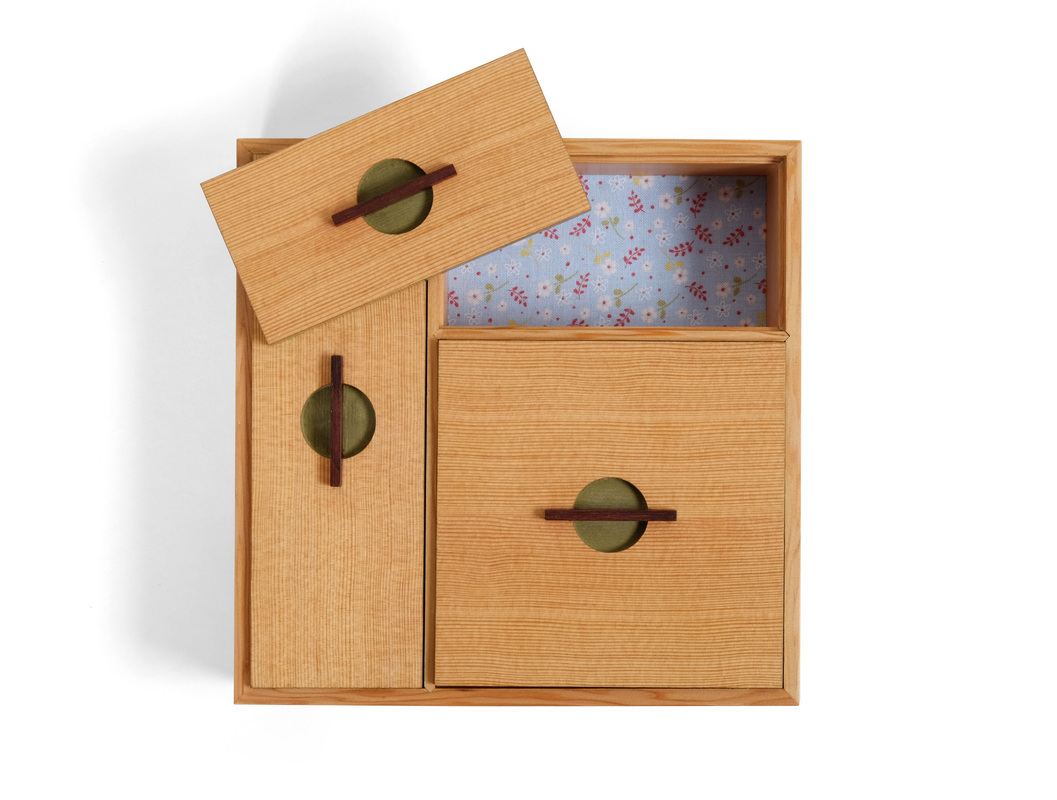
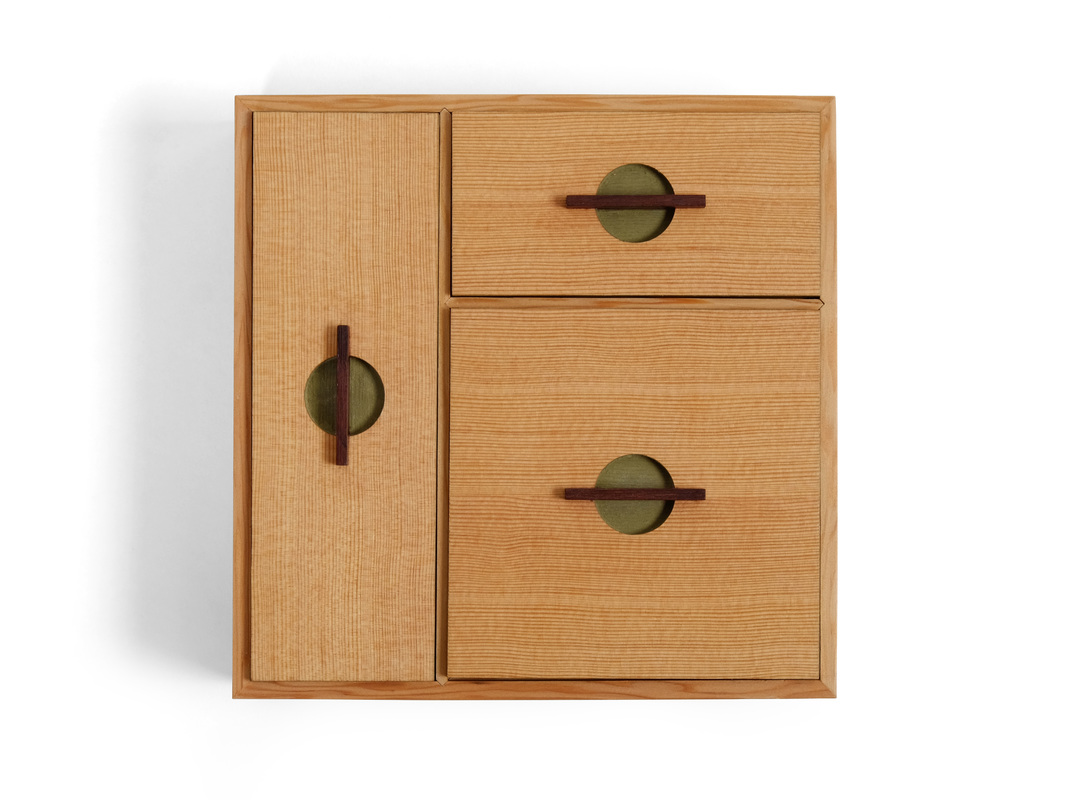
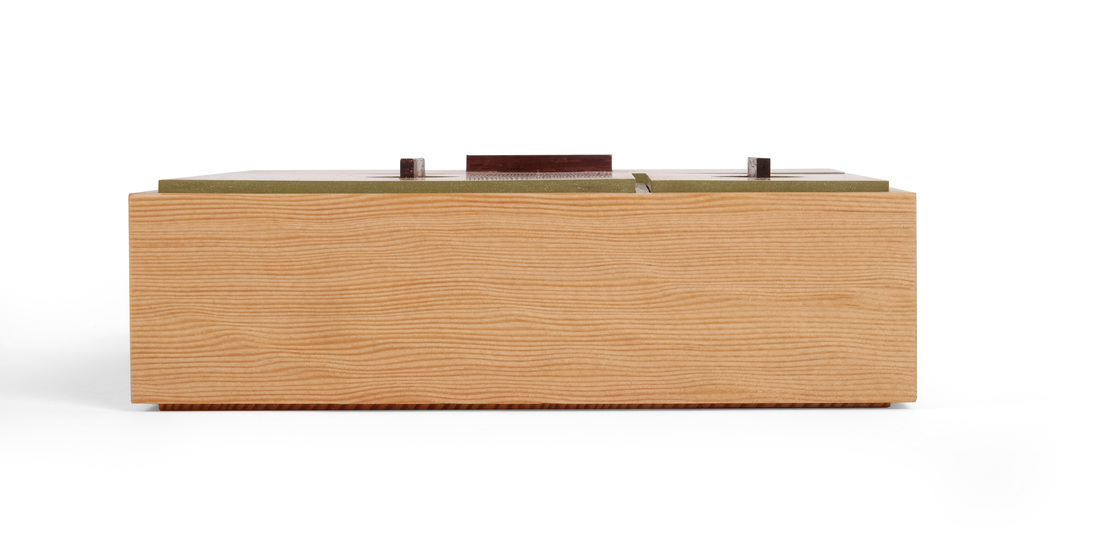
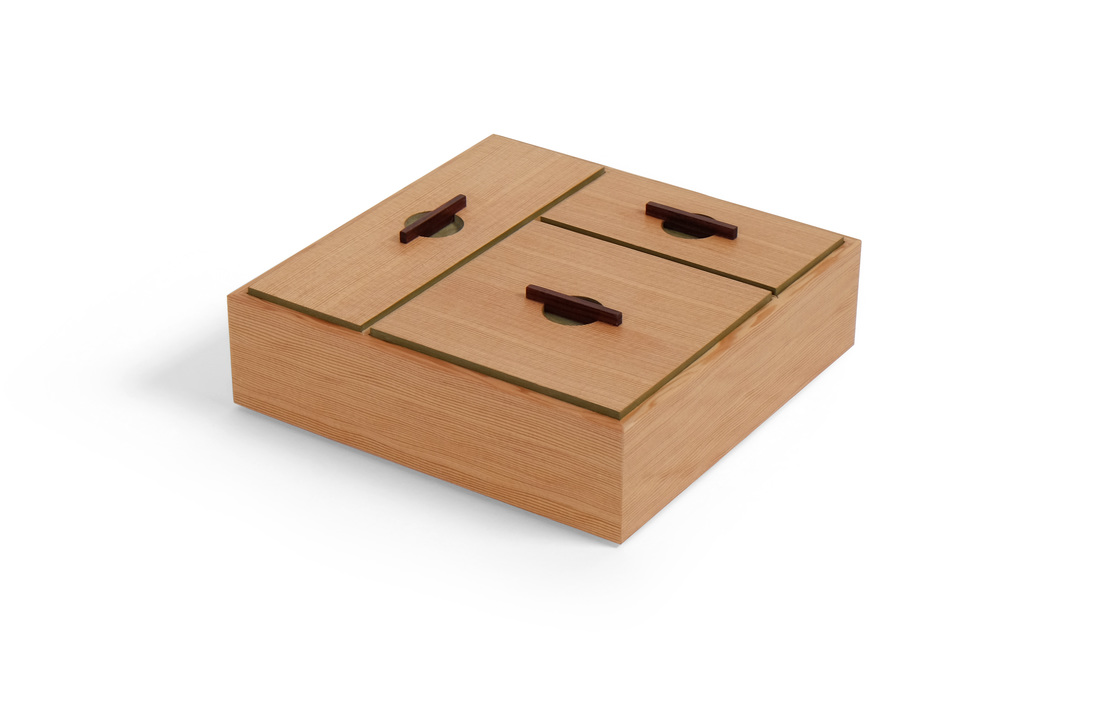
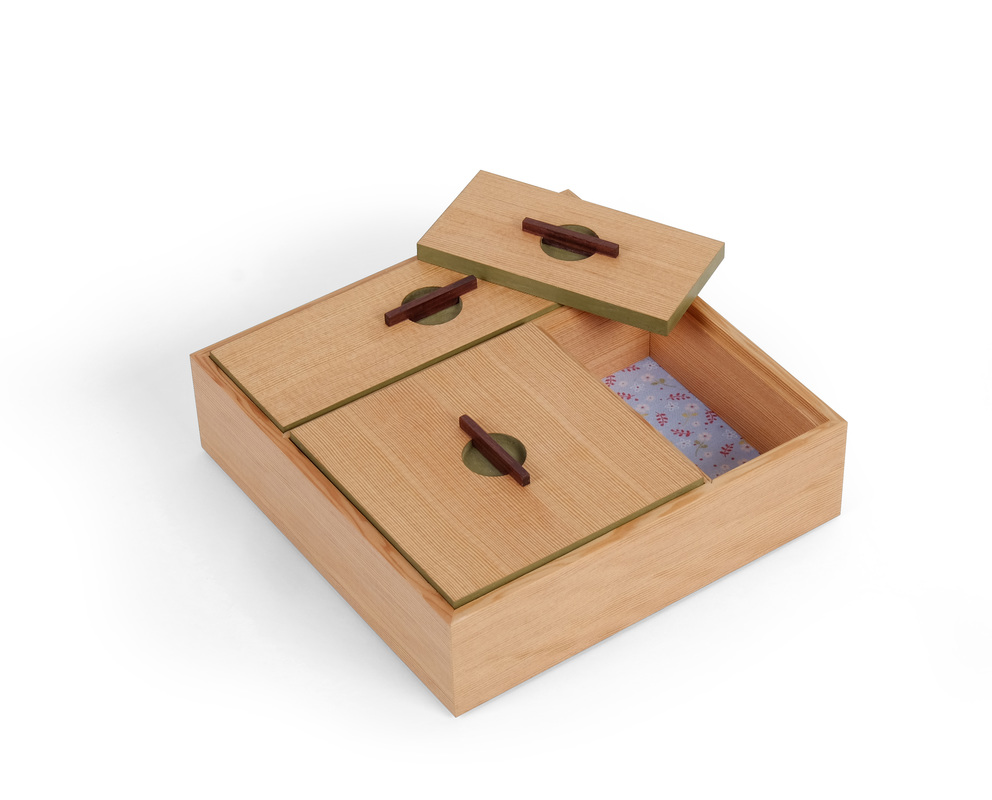
  I made a two of this box. One was for the 52 boxes project and the other was for the daughter of a friend who has given me a lot of great lumber over the last few years. When he gave me some wonderful vertical grain Douglas fir recently, I decided to use it to make a box for his adorable little girl. The boards were left over from a sideboard he'd made for her room. He and I have very different styles, but the fact that the box and sideboard were made from the same boards holds the two together. I know that doesn't say much about the design, but it's a part of this box's story. In fact, the wood is the origin of the box. I normally design and then pick lumber, but this time I was starting with the lumber and needed to develop a design that played to its strengths. I also needed more vertical grain Douglas fir, because what my friend had given me was really only enough for one box. Fortunately, I once found a 3 in. thick, 6 in. wide and 12 ft. long piece of Douglas fir in the corner of a lumber yard. I bought it without a second thought. I'm glad I did, because it's got some figure to it, a lovely, warm color, and super tight grain that's a bit wavy. (I used it's end grain to veneer the drawer fronts on this cabinet.) At any rate, I was designing with vertical grain Douglas fir in mind. What I wanted was a box that emphasized the tight, straight grain. This is no trouble on the sides. Make them rectangular, with the grain running the length. The lid is a different story. I knew that I wanted the box to have at least three compartments, because the three corresponding lids would allow me to play with the fir's grain. However, a box with overall rectangular dimensions limits the shape, size and arrangement of the compartments. So, I went square. I think this is the first square box I've ever made. It's 6 in. square, to be exact. The narrow, full-width compartment is 2 in. wide, or one third of the box's overall width. The smaller of the two 4 in. long compartments is 2 in. wide. The larger one is 4 in. square. These divisions make for compartments (and lids) that are well proportioned in themselves, in relation to one another, and in relation to box's overall dimensions. At the risk of putting even myself to sleep, here's a more detailed explanation of what's going on. The basic dimension of this box is 2 in. The sides are about 2 in. tall when you take the bottom and lid into account. The box is 6 in. square. That's three times the basic dimension, so there are three compartments. The dimensions for the compartments are all multiples of 2 in. My good friend Charles Hermann helped me work all of this out. He has a beautiful mind. (Get thee to Google to decipher this reference, my friends.) Back to the grain. The division and orientation of compartments allowed me to use the grain more boldly. It runs in one direction on the left side, and 90 degrees to that on the right side. Yet, because the grain is subtle, there's no uncomfortable tension created by this redirection of the grain. Somehow it's a dissonance that creates a harmony. I can't explain why this last statement, which makes the philosopher in me suspect it as Grade A bullshit, but I'll think about it some more and see if I can come to a meat-and-potatoes explanation. I wonder if my old friends, the Pythagoreans, might have something to say about this. Well, that's a lot of talk about grain, proportions, and patterns. Let's talk about something else: the pulls. This is the second time I've used this pull on a box. What I like about them is the play between the circular mortise and the thin, rectangular pull. Combined, they create a nice visual set against the background of the tight, straight grain of the Douglas fir. The depth of the mortise allows me to use a pull that's very low but still gives enough grip (the pull extends down into the mortise). And before you ask: No, I didn't use the same technique that was recently feature in Fine Woodworking magazine. (Everyone reads Fine Woodworking, right?) I don't mortise for the pull. Rather, it's T-shape and the horizontal bar fits over the lid. OK, I've written a lot, so I'm going to stop. (Don't worry, I've addressed the major design points of this box.) Enjoy some random thoughts.
4 Comments
Jerry
4/9/2016 08:48:56 am
Another beautiful box -- and an excellent use of the materials you chose. 9/30/2018 09:30:11 am
I am interested in how you made the handle for this box.
Matt
10/10/2018 09:32:15 am
I don't have instructions anywhere but it's not hard to make. The shallow hole is made with a Forstner bit. The pull is shaped like a T. The vertical part fits snuggly into the hole and the horizontal part extends over the top. It glue it in after painting the hole.
Walter Bobkaitis
7/29/2019 01:29:32 pm
I am wondering on how you attached the bottom of the box. The rabbet is only 1/16 inch narrow and then there's the fabric that goes from edge to edge. Your comment will be posted after it is approved.
Leave a Reply. |
AuthorI love furniture design, and smart techniques. This blog is about both. Archives
August 2020
Categories |
 RSS Feed