
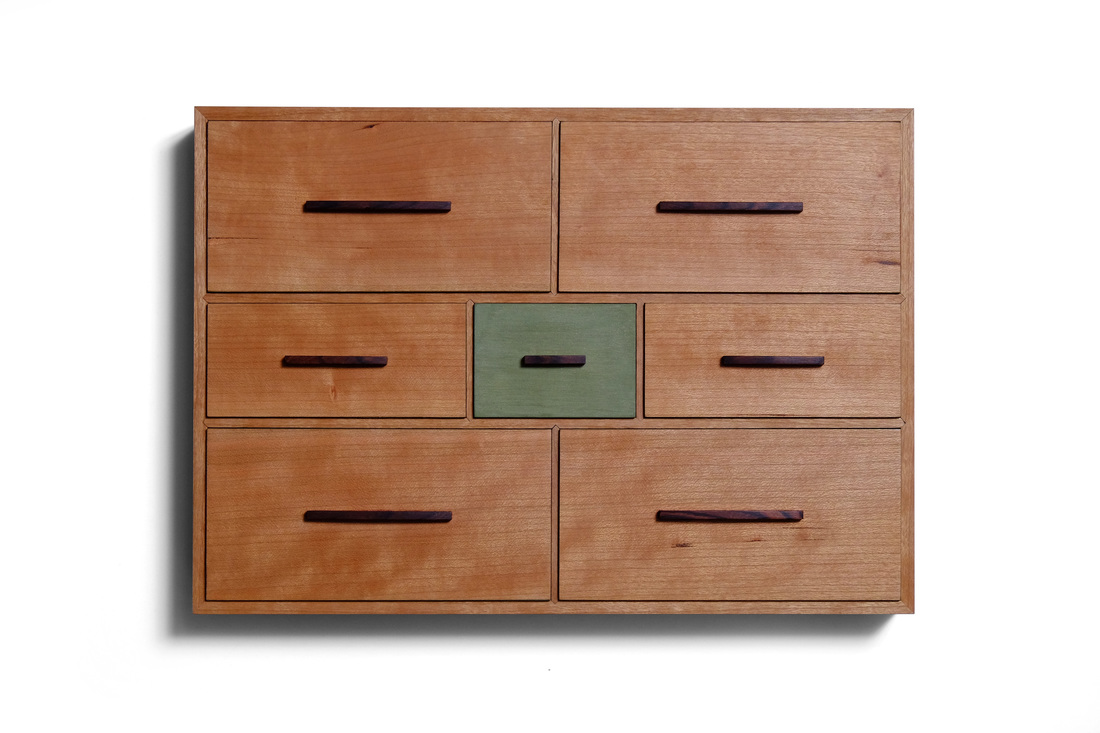
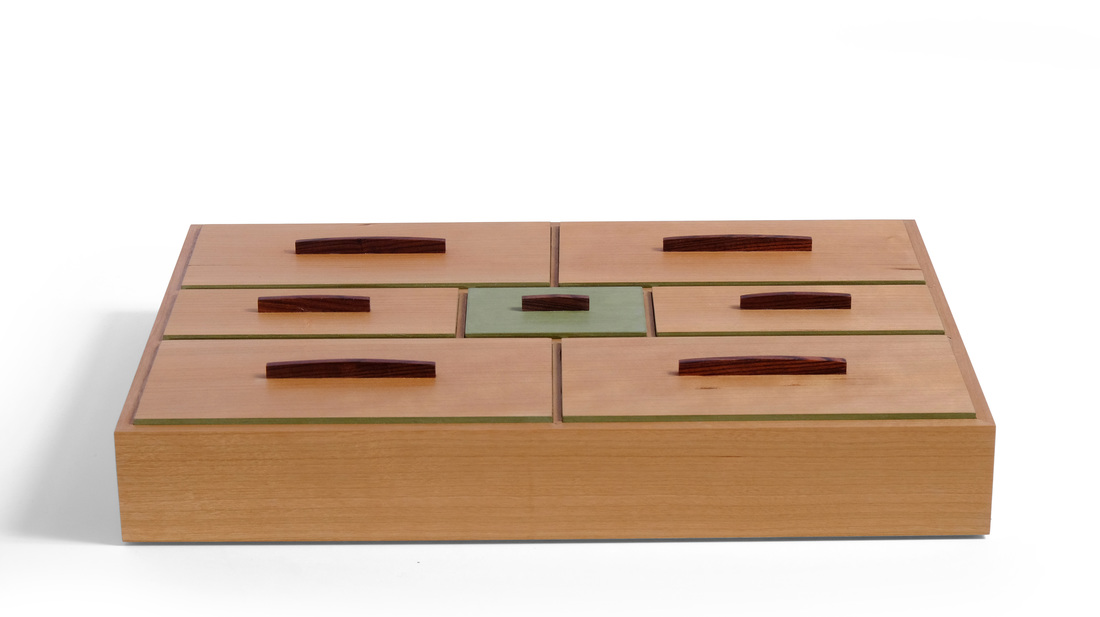
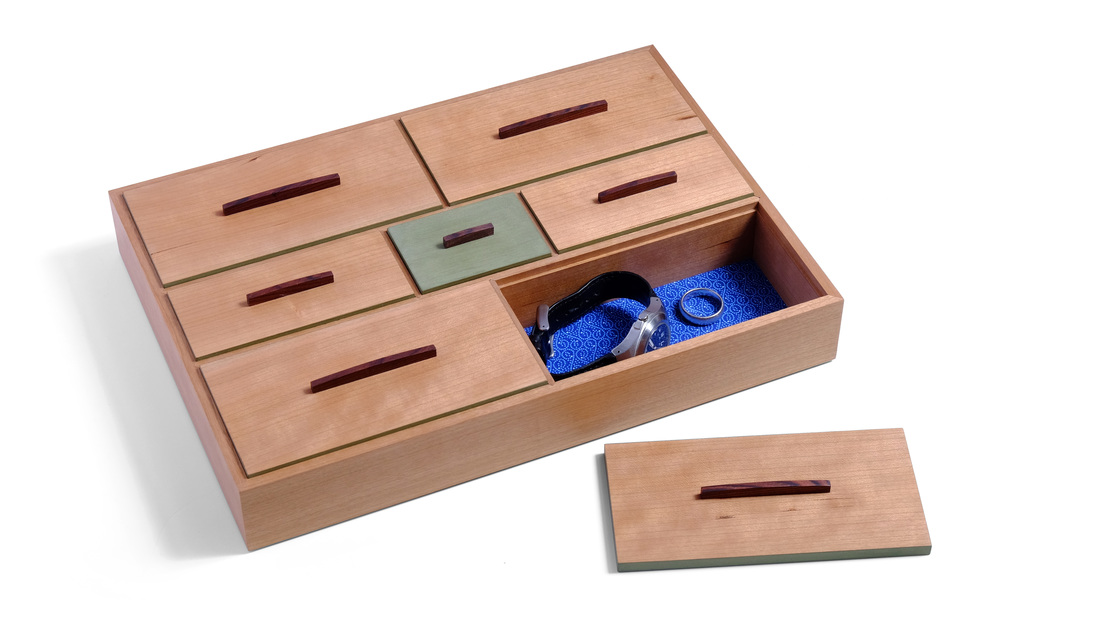
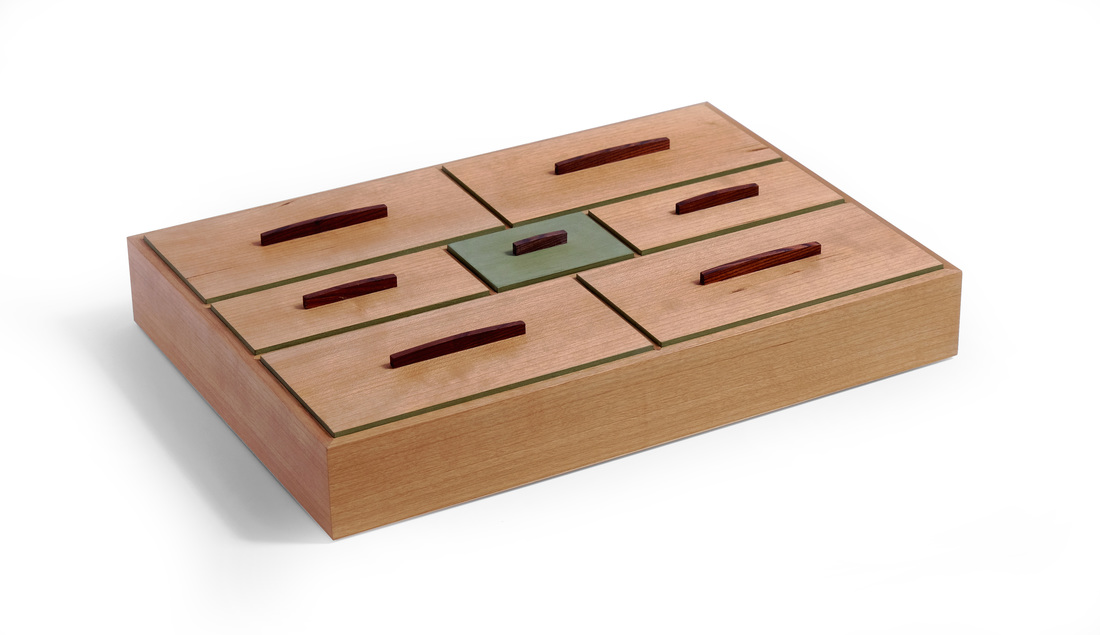
  When I'm designing a box, the first three things I think about are the box's proportions, whether I'll be able to use the box's elements (lids, pulls, etc.) to create a geometric pattern, and how to incorporate a bit of color without overpowering the box. All three elements have a prominent role in box 35. I'm not sure how I feel about the box, but the more I'm around it, the more I seem to like it. This is the biggest box I've made so far, it's just over 12 in. long and 8 in. wide. The sides are 1 3/4 in. tall. It had to be this big to get so many compartments into it and still have them useable. I actually started out by determining the sizes of the individual compartment lids. I drew them out full scale, with the spaces between them, and that determined the overall dimensions. Of course, I could have adjusted the length of width of the lids to change the box's proportions had they not been good. I'm glad that I didn't need to do that. However, figuring out that stuff came second in the design process. From the start this box was all about looking straight down at the lids, so I started by sketching out various patterns for them. I did this on a piece of graph paper with a 1/8 in. grid, so that I could draw a bunch of neat little scale patterns that are proportionally accurate. I don't worry about dimensions at this point. After I had the pattern and the proportions (for the big lids, it was 1 wide by 2 long—a nice proportion of width to length) I figured out the actual dimensions (going with 3 in. wide by 6 in. long). The spaces between the lids are just as important as the lids, so I spent some time figuring this out. The visible top edge of the sides is 1/4 in. wide. The two long dividers that separate the three rows are 3/16 in. wide on their top edge, and the dividers on each row are 1/8 in. wide on their top edge. The lids sit in 1/16 in. rabbets, so the sides are 5/16 in. thick. The long dividers are also 5/16 in. thick, but have a rabbet on both sides. The short dividers are 1/4 in. thick. The lids, plus the spaces between them, create a nice pattern. The pulls also create a pattern. There are a couple things at play with the pattern created by the pulls. First, there's the placement of the pull on the lid. I centered them, knowing this would create almost a rounded pattern. Second, there is the length of the pulls. Changing their length would change the look of the pattern. I think I did OK on this point. The pulls were actually the hardest part of this box. Initially, I was going to use rectilinear pulls, but they looked weird. Fortunately, I recalled the pull I made for box 33. It's something of a stressed arc. I used that shape here, too. It greatly improve the look of the box over simple, straight top edges on the pulls. No matter how good you think something looks, always ask yourself what you could do differently and play around with the ideas that come to mind. So, that's proportions and patterns. Let's talk colors. You've got the earthy, warm brown of the cherry. (All of the cherry came from a single board. It's the edge grain of a very old piece of 12/4 I bought from a former FWW editor, along with many other pieces of 12/4 cherry.) Then there's the rich brown of the kingwood pulls (made from material left over from the sides of box 33). I knew that I wanted paint the center lid. Picking the color wasn't tough. This particular green goes well with just about every wood I use. But that's not the only place I used it. I also used it on the edges of the other lids. This, I thought, was necessary to give some separation between the cherry lids and the cherry sides. It helps to emphasize the pattern created by the lids, too. The edge of the bottom is painted green, too, but you can't see it in any of these pictures. The last bit of color is discovered when you open one of the compartments. I covered the bottom with a bold, blue fabric. I love how it jumps out, and adds a bit of brightness to the interior. There's a lot more I could write about this box, but I've blathered enough. Let's get to some random thoughts.
8 Comments
Jeff Moore
11/28/2015 01:33:46 pm
Another gorgeous, finely crafted box, Matt. As one who struggles with the creativity side of woodworking, I really appreciate you sharing your thought process in designing these beautiful boxes. Good stuff!
Matt Kenney
12/2/2015 01:16:50 pm
No problem, Jeff. And thanks for the reading along. It's good to know that at least a few folks enjoy it!
Jerry
11/28/2015 05:38:11 pm
Nice box box. Proportions are spot on.Materials are excellent. Very pleasing to the eye.
Jerry
12/2/2015 12:47:46 pm
BTW--
Matt Kenney
12/2/2015 01:15:38 pm
Thanks, Jerry. And thanks for watching the video series. It was a lot of fun to make. It's the first time FWW has done a video with two persons. I'm glad it turned out so well. 12/26/2015 09:09:54 pm
BEAUTIFUL BOXES-IN EVERY WAY. I DO NOT HAVE A MIND FOR DESIGN, BUT I DO APPRECIATE YOURS.
Nick Saunders
5/21/2020 09:06:18 pm
This one is my favourite out of the 52!. Matt, out of interest and if you don't mind my asking, where do you get your fabrics and paper that you line you boxes with?
Matt Kenney
6/24/2020 09:02:28 am
I don’t use paper. I get fabric from various fabric stores. The easiest place is Joann Fabric. It’s all over the country. You check Etsy, too. Your comment will be posted after it is approved.
Leave a Reply. |
AuthorI love furniture design, and smart techniques. This blog is about both. Archives
August 2020
Categories |
 RSS Feed