
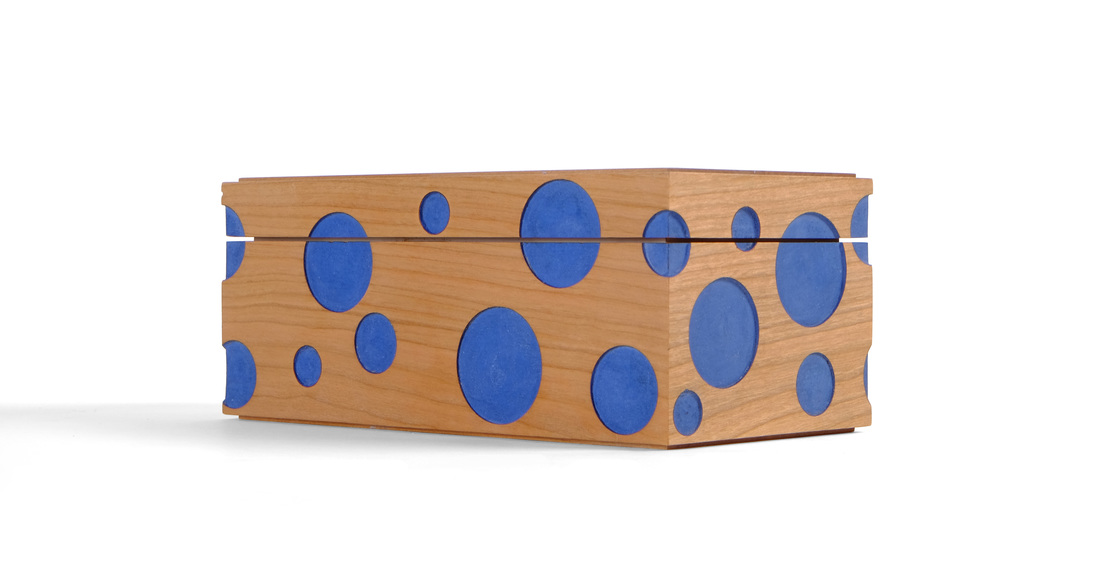
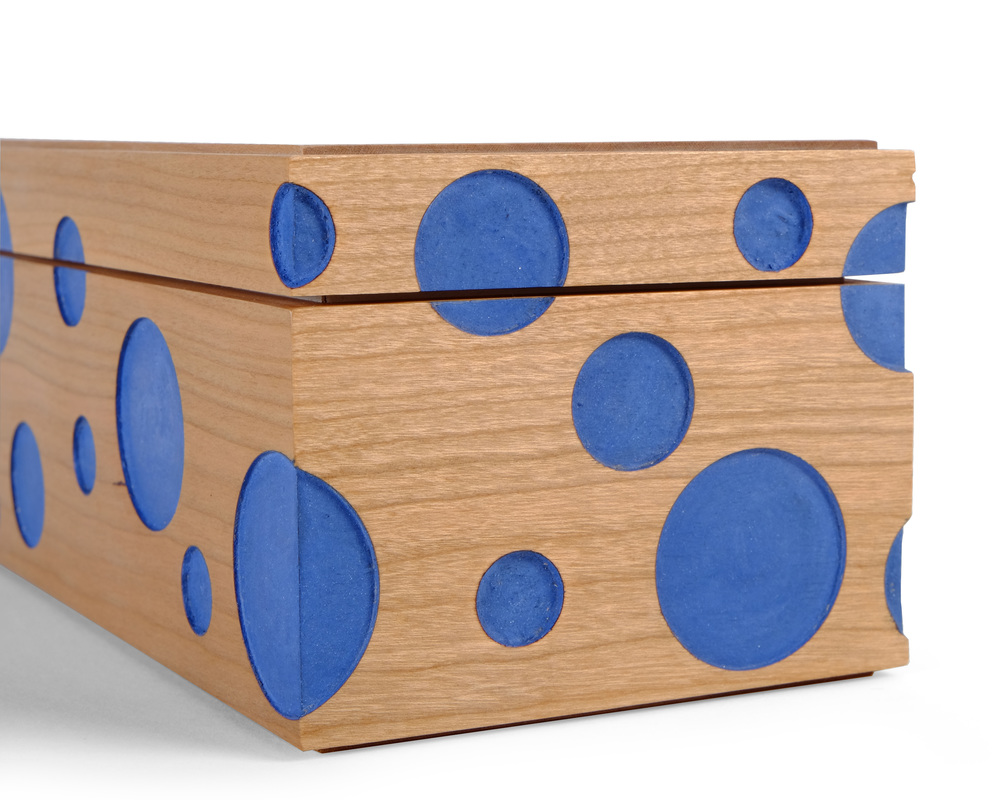
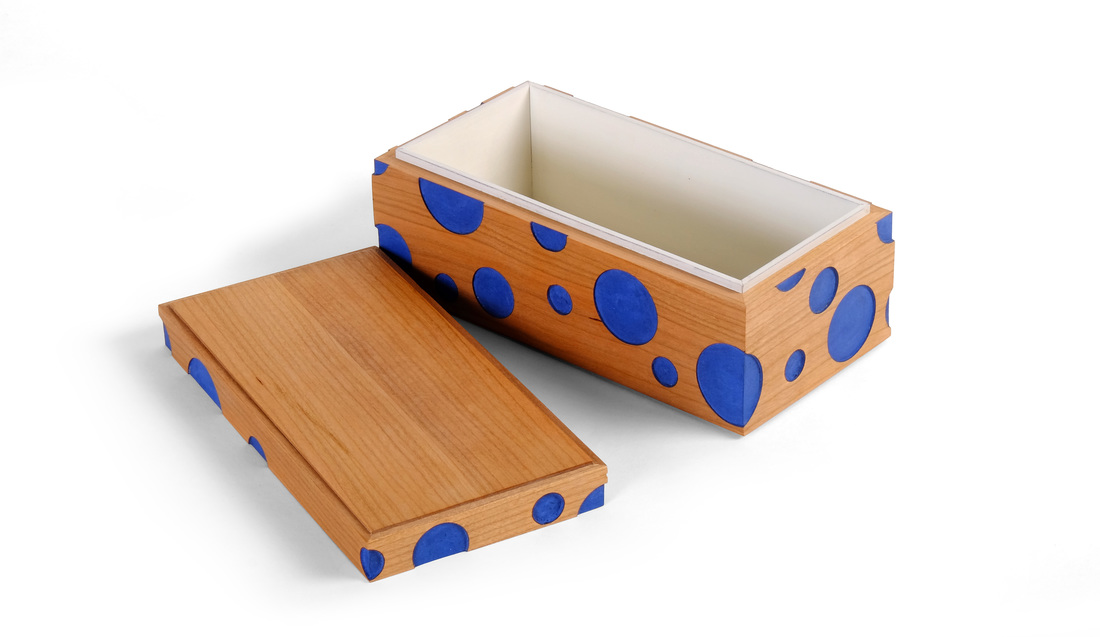
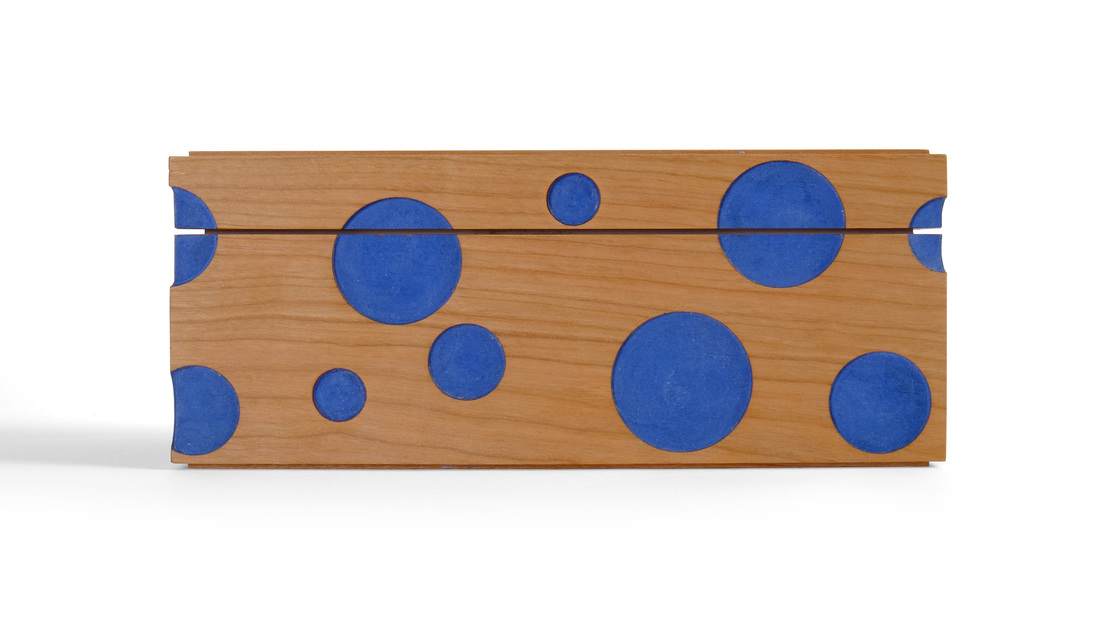
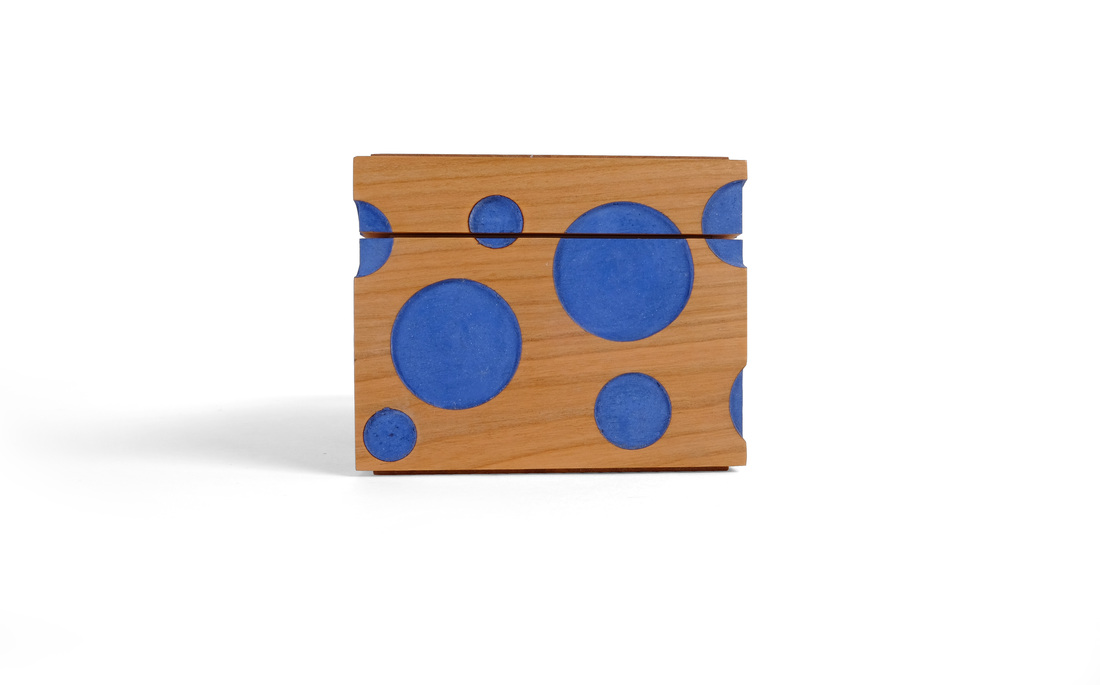
  I was tempted to post nothing but photographs of this box. I think these photos say more than enough about the box, but I figure at least a few will want to know what the hell I was thinking when I designed it. So, I'll do some writing, too. This is one of the first boxes I thought of after deciding to attempt 52 boxes in 52 weeks. Honestly, I don't recall where the idea came from. I think something like it has been bouncing about my brain for several years. I do know that it was boxes like this one that inspired me to undertake the challenge. All of the boxes I've made so far have been nice, but some of them really didn't push me aesthetically. I fell back into my comfort zone. This box is definitely not one of those. What appeals to me about this box is how strong a graphical statement it makes. I love that the blue circles dominate the box. The riftsawn cherry I used for the sides is really just a background color. That's what I wanted. This box is about color and geometry. (But note how the cherry's grain rises and falls with the larger circles. This symmetry between the grain and pattern of the circles helps the grain disappear. Again, design is always in the details.) This also is why the top is made from some book matched and riftsawn cherry. Keep the grain quiet. Don't distract from the sides. I thought about adding a few circles to the top, but I'm glad I didn't. That would have been too much. This box took a long time to figure out and make because it is technically challenging. The blue circles you see are actually about 1/16 in. deep. At first, I was going to drill through a thin, shop sawn veneer, paint the underlying substrate and then glue the veneer to the substrate. I thought and thought about how to do that and still get a good four corner match. All the solutions I came up with were too fussy. I then moved to the idea of making a template and routing the circles into the sides. That's what I did, but I need to thank Mike Pekovich for helping me figure out exactly how to do it (Mike and I have some great mind melds every now and then when we bat ideas back and forth, developing them—sublating [google Hegel and aufheben] them, really—as we go. These always seem to benefit me. I doubt I've ever helped Mike. He's a technical genius.) After cutting the sides to length, I laid them out in order (front, side, back, side) between two fences and two stops at the ends. A long template fit over the top of the sides. I then routed the circles with my DeWalt 611 with the plunge base. I used a 1/2 in. diameter "dado clean out" bit from Whiteside. (It's the same bit I use with hinge mortise jigs.) This arrangement allowed me to wrap circles around the corners. I don't know if any of that makes sense, but I took some pictures and I'll post them to my Instagram account (kenney.matt). Here's another important part of the design that also involves technique. Some of the circles bridge the bottom and top. I cut the top free at the bandsaw and then sanded the top and bottom on a piece of sandpaper stuck to my tablesaw to get rid of the machine marks. The cutting and sanding removes material and part of the circles. If the top sat directly on the bottom, you'd see a disruption in the circles' circumference. To overcome this, I used the box liner to raise the top and create a gap equal to the material removed. (Remember when I did this with box 12? I was testing out the technique so that when I made this box, I'd have it figured out. I've been working on Box 30 for a long time.) I need to thank Mike for planting the seed for this in my mind. I come to him with crazy ideas and the beginnings of how to get it done and he helps me get to a solid technique for doing it. I don't know what else to say. The box is the same size as boxes 28 and 29. The top and bottom are glued into rabbets. They're plywood—painted on the inside face and covered with shopsawn veneer on the outside. The liner is cherry, too, but painted with light cream milk paint from Old Fashioned Milk Paint. The blue for the circles is my old friend, Federal Blue. Looks like random thoughts are back on the menu, boys!
17 Comments
Josh
10/23/2015 11:43:36 am
Love the box blog, Matt. Do you use any finish on the boxes other than the milk paint? Wax maybe? Thanks for sharing.
Matt Kenney
10/23/2015 11:51:37 am
Josh,
Jerry Stark
10/23/2015 05:40:27 pm
I like the box a lot. Very cool idea and nifty execution.
Matt Kenney
10/23/2015 11:12:16 pm
Jerry,
Jerry Stark
10/23/2015 06:03:06 pm
Got to thinking... the perils of perseveration aside...about how to build this box with irregular shapes. A few thoughts.
Matt Kenney
10/23/2015 11:13:48 pm
Jerry,
Jerry Stark
10/26/2015 01:40:47 pm
My initial thought was to rout only a 16th or an 8th of an inch into the face of the case. With stock about 1/2" thick, or so, this would leave a sturdy case with good glue surfaces at the corners for mitering, if that is where one wanted to go.
Lou Adzima
10/24/2015 09:10:55 pm
Love it Matt, one of best yet. Yada, Yada, Yada. Lets see the next one.
Matt Kenney
10/24/2015 09:51:34 pm
Ha! I'll finish box 31 tomorrow, but you'll have to wait until Thursday to see it!
Michael Ek
10/25/2015 10:32:57 am
Matt,
Matt Kenney
10/26/2015 09:25:39 am
Which beer? The most expensive kind I can find! Actually, I'd really want some Nut Brown Ale from St. George Brewing, but it's super local to Virginia. Oh well.
Stan
11/7/2015 08:57:20 am
Why the f-bomb in random thought 4? No longer something I can share with students. Beautiful box though.
Matt Kenney
11/10/2015 10:04:09 am
Sorry about that, Stan. Because someone said the blue circles look like bubbles, I thought of Bubble from Trailer Park Boys, and that's something he said once. He's a big believer in the existence of Bigfoot, which he calls samsquanch. It never occurred to me that younger folks would read this. Perhaps you can just show the photos.
Stan
11/10/2015 11:06:40 pm
Hi Matt, thank you for the thoughtful response, I really do appreciate it. I teach a class of middle school kids who do better with their hands than with they do in pure academia. I'm a big fan of your work and your writing, and because I expose these kids to as much quality making and inspiration as possible you are a natural fit. Already showed them the box, because it's so out-of-the-box, so to speak and they loved it. It's the kind of work they aspire to, way more than the traditional, old school stuff I'm accustomed to. Thanks again.
Tim Cornillaud
5/13/2016 01:12:46 pm
Very cool.
Robert
1/3/2019 12:25:11 am
Love the boxes and even more, love the random TPB quote. One of their best episodes for sure. Your comment will be posted after it is approved.
Leave a Reply. |
AuthorI love furniture design, and smart techniques. This blog is about both. Archives
August 2020
Categories |
 RSS Feed