MEK Woodworks
  • Home
  • Store
  • 52 Boxes
  • Portfolio
  • About
  • Blog
  • Teaching

Box 12

7/2/2015

5 Comments

 
Picture
Picture
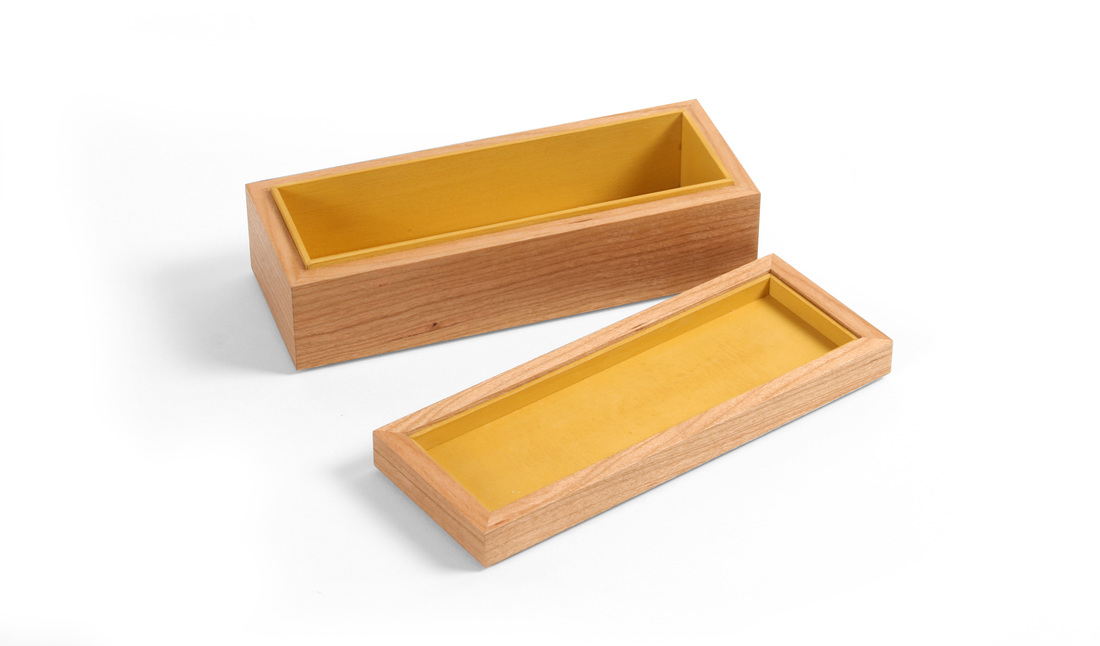
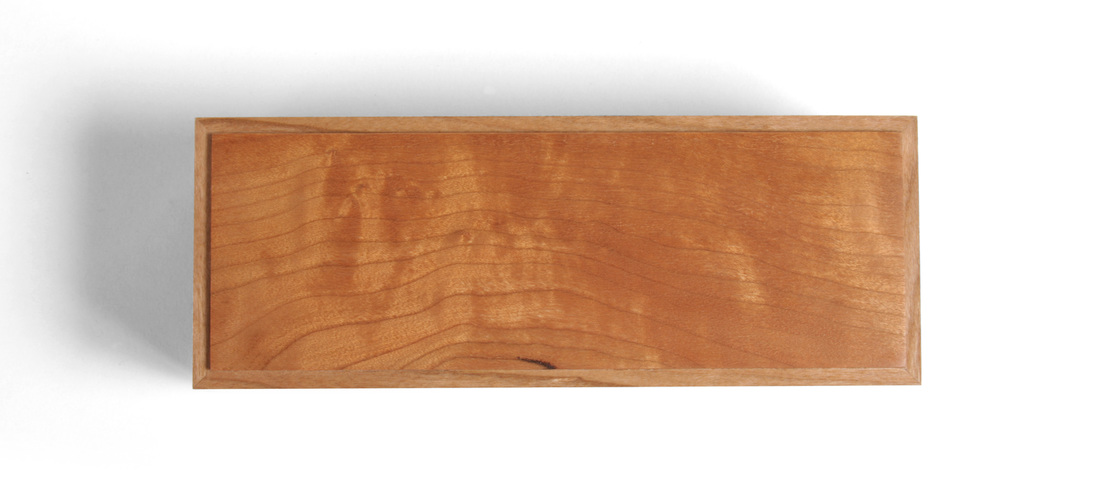
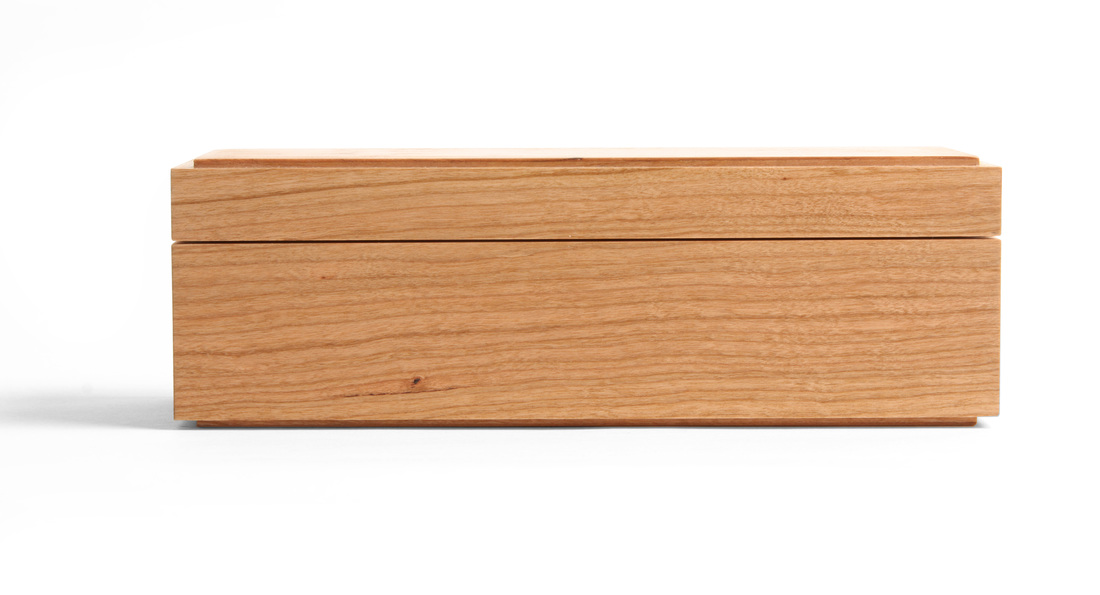
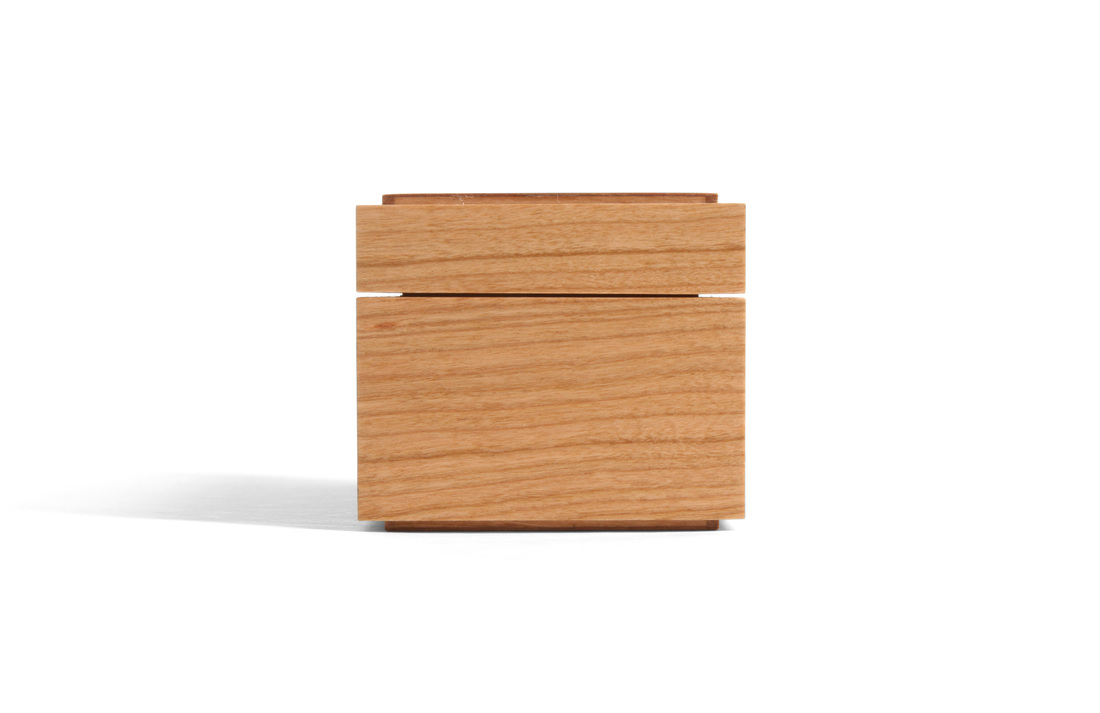
The proportions and general design of this box are strongly tied to the boxes that I've already made, but there are two new twists, and both work nicely, I think. First, the complete interior is painted. The inside faces of the top and bottom are painted, but the inside faces of the box sides are not. Instead, I painted some liners and put those in after I cut the lid from the box. I did this instead of painting the sides, because I wanted to use the liners to achieve the second new feature. Notice that there is a liner not only in the bottom (a common technique to keep the lid in place), but also in the top to create a small (1/16 in. wide) separation between the box body and lid. By adjusting the height of the liners in the lid, I could alter the width of the space between the box and lid. I like the dark shadow line it creates. I settled on 1/16 in. because that's the width of the kerf cut by the blade in bandsaw (it has carbide teeth, so it cuts a wider kerf than many bandsaw blades). The grain flow from bottom to lid is natural this way. There's no discernible hiccup in the flow as there would be if the lid sat directly on the box sides. Also, the top and bottom are both 1/16 in. proud of the sides to mirror the shadow line between the lid and body.

Now, back to the painted interior. I've wanted to do this for a long time, but this is first box it was suitable for. Perhaps it's not a surprise, but I like it. To do this successfully, the interior must be lighter than the exterior. Right now the cherry is still a bit reddish pink, but it will darken in time, the marigold yellow on the inside will stay just the same, but pop all the more as the cherry darkens. It's really going to be eye catching in about a year. And, of course, marigold yellow milk paint has once again done me right. If only she could drink whisky, dance to Van Morrison in the setting sun, and cook a mean low country boil.

The cherry veneer I used for the top and bottom is much darker than the cherry I used for the box and lid sides. Part of that is a function of age. I've had the veneer for at least 8 years. But it was dark when I got it, and it didn't change color when I scraped and sanded it. It is oxidized all the way through. You might think that's only possible because it's so thin, but I've cut into very old cherry boards that were completely oxidized throughout their thickness—and these were 1 in. thick boards. Jointing, planing, hand planing did not change its color. I hope the veneer is always darker than the sides. They compliment each other nicely. And this can be applied more broadly. What's a great wood to pair with hard maple? Figured maple. A good wood for sapele? Ribbon figured sapele. You don't need to go to a strongly contrasted color to create variance. Do something subtle. Subtle is good.

These thoughts be random. Argh!
  1. There is a story of some undetermined quality behind the veneer I used to make the top and bottom. The short version: A cabinet shop in Columbia, SC was closing down. The owner hired two persons of questionable judgment and illegal predilections to dispose of all his veneer. They decided to throw it in a dumpster, which just happened to be behind a local woodworking supply store. I was there that morning. The owner of the store began pulling the veneer out of the dumpster and then had the two fellows unload the rest directly into his store. I had first pick. This cherry was a nice flitch of 15 in. wide highly figured veneer. $1 per sheet. I also got a 15 piece flitch of very curly tiger maple. $1 per sheet. That was a good morning.
  2. The liner was made from some very thin popular (about 1/16 in.) I had sitting around. I originally milled it to make some small pieces of plywood in my vacuum press. It allowed me to create flat plywood with a custom thickness for a small jewelry cabinet with madrone veneers on the doors. I know it's thin, but that matters. This is a small box, so anything thicker would have looked out of place.
  3. Look at the glorious little pitch knot on the front. It's not centered. It's just the right amount off-center. All by design. When I cut out the cherry for this box, I stared for a while, thinking about exactly where to cut it to get that pitch knot where I wanted it. I think I've said it before: There are no accidents in design. Be deliberate.
  4. A nice little cartoon I saw once. Pirate says to his pirate captain, "The cannons be ready." Pirate captain responds, "Are."

Picture
Picture
Picture
5 Comments
Jerry Stark
7/21/2015 02:08:24 am

The reveal between the lid and the box is a great touch. So simple, yet perfect.

As William Kidd walked up the stairs with treasure bags clinking, Sarah asked, "What are you doing, my dear?" He replied, "Shaking my booty."

Are!

Reply
Emil link
9/7/2015 02:59:29 pm

How do you make the hidden joints and add the bottom of the box? Love the boxes and I want to make something like it.

Reply
Matt Kenney
9/8/2015 02:30:48 pm

Emil,

I think you are asking about the joints at the corners. Those a miter joints, and I cut them either at the tablesaw or by hand using a shooting board and a hand plane. The bottom of the box fits into a rabbet that's cut into the sides. I make the bottom from a core of thin plywood. After cutting the plywood to size, I glue on solid wood edge banding. Do two opposing sides at once, using banding that is longer, wider and thicker than it needs to be. Trim the length and thickness flush with the plywood and then plane the thickness so that the bottom fits into the box. Add the other two opposing sides and repeat. Then glue on a veneer (shopmade or commercial) onto one face of the plywood, covering the edge banding. Trim flush. Repeat for the other face. Done. I hope that's not too confusing.

Reply
Chris
9/30/2015 02:55:31 pm

Matt, I love your boxes, I think they are a great combination of woodworking techniques with a more modern design eye.

Did you pre-finish the wood linings before installing them into the box? If so, did you do anything special to prevent the milk paint on the back of the lining (i.e the little bit of lining that pokes out of the box to create the space) from interfering with your glue joint, or is it fine to glue over the top of the milk paint? Thanks for info and can't wait to see the rest of the boxes.

Reply
Matthew Kenney
9/30/2015 04:11:49 pm

Chris,

I think it's OK to glue to milk paint, as the paint forms a crazy strong bond to the surface it covers. But these liners aren't glued in. It's just a friction fit. This works fine as long as the fit is right. Thanks for reading the blog and for the compliment.

Reply

Your comment will be posted after it is approved.


Leave a Reply.

    Author

    I love furniture design, and smart techniques. This blog is about both.

    Archives

    August 2020
    July 2020
    June 2020
    October 2018
    July 2018
    October 2017
    September 2016
    April 2016
    March 2016
    February 2016
    January 2016
    December 2015
    November 2015
    October 2015
    September 2015
    August 2015
    July 2015
    June 2015
    May 2015
    April 2015

    Categories

    All
    52 Boxes
    Box
    Design
    Kumiko
    Turning

    RSS Feed

  • Home
  • Store
  • 52 Boxes
  • Portfolio
  • About
  • Blog
  • Teaching